Showing posts with label Resist. Show all posts

Thursday, September 8, 2011

Upcoming Classes


I will be doing a 2 part scrap class at A Work of Heart in Willow Glen. I will be teaching a 2 page layout class using a variety of media and techniques, including heat embossing, resists, stamping on acetate and punches/die cuts. Below is the layout :


The dates of the class are: September 21 and 28 from 6:00 to 8:00pm. For more information, click here.

Sunday, November 28, 2010

More Background Fun

I hope everyone had a wonderful Thanksgiving holiday! I had planned to complete the series on backgrounds before Thanksgiving, but time has a way of fleeting when you have kids home from college.

The above panels were the result of pigment and dye ink resists. The motif was stamped in hybrid pigment inks (matte and pearlized) and allowed to dry for a minute or two. Once dry, I brayered dye ink over the top (I used Ranger Adirondack Cranberry). I lightly buffed over the areas of pigment ink. I think this is a great background for holiday cards or tags.  Give this a try - quick and simple, and easy to incorporate into your Christmas/Holiday cards.

Sunday, November 7, 2010

Glimmer Glaze Resist

Since I purchased a couple of bottles of Tattered Angels Glimmer Glaze and Glimmer Glam, I have been trying a variety of techniques. I would not buy any more (as I have not been that impressed with the product), but I do want to use them.

I decided to try stamping with Glimmer Glaze. I painted a couple of colors directly on the above Club Scrap stamp. I then stamped it onto matte coat card stock. I let it dry naturally. Then, once dry, I decided to that I really needed a colored background...so, what the heck, I will spray on a couple of colors of Glimmer Mist. After spraying, I blotted the image and found that the Glimmer Glaze resisted the Glimmer Mist. The original Glaze colors were not muddied by the Mist.

The panel was then trimmed and mounted onto color card stocks.  For the corners of the image panel, I wrapped Washi tape around them to mimic photo corners. (BTW- Ginko Papers, where I have purchased many of my decorative tapes has some great new colors and images, just in time for the holidays!)

What discoveries have you made in the hopes of finding interesting uses for products? Start playing - and please let me know!

Monday, April 5, 2010

Gesso Resists


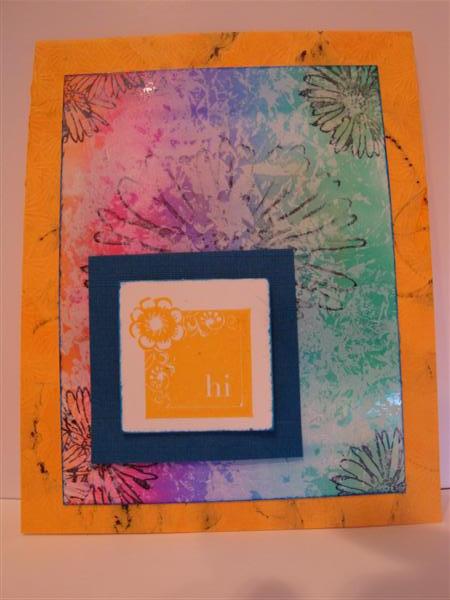
These two cards have a slightly different resist technique from those previously posted. This technique still involves stamping on glossy, white cardstock, and brayering with a rainbow ink pad. However, we will add a little gesso and a little dye reinkers.
This technique is from "Technique Junkies" newsletter and is great fun. I have altered the steps a bit for these cards. Stamp your image with a permanent ink (I used StazOn) . I then added a little color from watered down dye reinkers (a little metallic gold). Once dry, scrunch up some wax paper ("scrunch" being my technical term!) and dip it into the gesso. Dab the gesso over the cardstock - leaving white areas. Once dry, brayer with the rainbow pad of choice. It does not take the gesso very long to dry as long as it is not applied too thick.
All cardstocks and background stamp images are from Club Scrap. The square stamp images are from Stampin' Up. If trying different techniques interest you, I highly recommend that you visit Technique Junkies and order a CD or two and/or subscribe to the newsletter.

Tuesday, March 23, 2010

Alcohol Resists

I was playing around with various art medium techniques last week. I thought it was time to break out the alcohol inks, since it had been a while since I put them to use. The background panel on this card was the beneficiary. I clear heat embossed the swirl design on the white glossy cardstock. I then added 3 colors of alcohol ink to the panel. After allowing it to dry, I placed another piece of glossy white cardstock on top and ironed the pieces together. Then, I pulled them apart. The embossing was removed and transferred to the other piece - as was some of the color.
Here is another example of the technique. This is the "original" embossed and alcohol inked glossy white panel. I placed a second glossy white panel on top and used a hot kraft iron.

This was the "transfer" piece. I did add some Distress Ink in a similar color help the embossed image to stand out a bit. Quick and easy - and a little different twist on resist and alcohol ink techniques!


Monday, March 8, 2010

Resist with a Twist

Here is my final resist technique to share. Instead of starting with white glossy cardstock, I brayered pastel dye ink colors all over the panel. Once the ink was dry (it did not take long), I stamped the image using Versamark ink pad. Make sure to get good ink coverage on the stamp.
Once the Versamark ink was dry, I brayered over the panel with Marvy Orchid dye ink. The lighter colors under the Versamark ink really pop out!

For this technique, it is important to use light colors as the first layer and a darker color on top. I tried a few darker colors as the first layer - not as effective and a bit muddy. All cardstock and stamps are from Club Scrap.

Give it a try and enjoy!

Wednesday, February 10, 2010

Using Ribbon..

An easy way to use ribbon or fibers on a card, loop it through a tag. I made the tag by cutting a rectangle and punching the top corners. I stamped the swirl background image using a VersaMark ink pad. I then over stamped the greeting. All the stamp images and cardstock are from Club Scrap Solstice kit, except for the greeting, which is from Science.

The background is a resist technique. I clear embossed the design and then sprayed Glimmer Mist over the top. Once it was dry, I buffed the embossed images with a dry towel, removing the Mist off the embossed images.

A few other fiber/ribbon uses: tie along the inside or outside edge of a card; hang charms, buttons, die cuts; and, using around present images.