I had a few moments recently, and thought it would be a good time to start on the shadow box I painted a few weeks ago. I used a page of Carta Bella's All Hallow's Eve, some ephemera and a glass bottle:
I used black alcohol ink to color the bottle. Drip a couple drops into your glass and rotate the bottle for coverage. The bird cage is a 3-D acetate sticker.
This is a close up of the top slot. I have a few more things to add here - possible some pen nibs, etc.
Showing posts with label project. Show all posts
Monday, September 24, 2012
Thursday, September 6, 2012
Starting to Feel it...
As some might know, I have been pretty quiet creatively. Family issues have taken a lot of my time - and a lot of my energy. I won't bore you with the details, but it has been difficult. So, I am attempting to jump start my creativity once again - perusing magazines, books, Pinterest!
Since Halloween will be approaching, and I have always loved Halloween, I thought I might do a project to get me back in the groove again. I haven't gotten very far, but it IS a start:
This is actually an old Club Scrap chipboard project that I thought I might turn into a Halloween vignette. The base is brown. with touches of black. I will probably do a bit more aging before adding paper, ephemera etc. I am starting to feel it...
Do you create under stress? Is it therapeutic to pour yourself into a project or do you become stagnant?
Since Halloween will be approaching, and I have always loved Halloween, I thought I might do a project to get me back in the groove again. I haven't gotten very far, but it IS a start:
This is actually an old Club Scrap chipboard project that I thought I might turn into a Halloween vignette. The base is brown. with touches of black. I will probably do a bit more aging before adding paper, ephemera etc. I am starting to feel it...
Do you create under stress? Is it therapeutic to pour yourself into a project or do you become stagnant?
Thursday, June 7, 2012
Spray Paint part 2
Yesterday, I posted a spray paint project my friend,Nancy, and I did. I was letting the finished projects dry an extra day before using them. The back of the desktop organizer:
The same object - side view:
And, the completed view of the organizer as it will sit on my desk:
I added polka dot Washi tape to the front and along the edges of the compartments. The completed plastic tumbler that I use for miscellaneous storage:
The top band is actually painted red, while the dotted pattern is painted black. You could also add stamping or collage if you do a project like this. I liked the graphic urban design feel of the paint without any more decoration.
The same object - side view:
And, the completed view of the organizer as it will sit on my desk:
I added polka dot Washi tape to the front and along the edges of the compartments. The completed plastic tumbler that I use for miscellaneous storage:
The top band is actually painted red, while the dotted pattern is painted black. You could also add stamping or collage if you do a project like this. I liked the graphic urban design feel of the paint without any more decoration.
Wednesday, June 6, 2012
Spray Paint!
No, I have not been out tagging public property! Maryjo McGraw posted a project involving decorating plain plastic items. Nancy and I are followers of Maryjo's "secret blog", and decided we would try the spray painting project. Since we knew we would not do this on our own, we met at my house with items, cans of paint and stencils.
First, I sprayed a clear desktop sorter with white spray paint. I did 2 light coats. I also sprayed a plastic tumbler that I use for water for paint brushes.
I really love this stencil and thought I would use it on my plastic pieces. Using painter's tape and newspaper, I masked off the portions I did not want to stencil. I used a red "stained glass" effect spray paint that Nancy brought over. I used the same stencil and paint color on my tumbler.
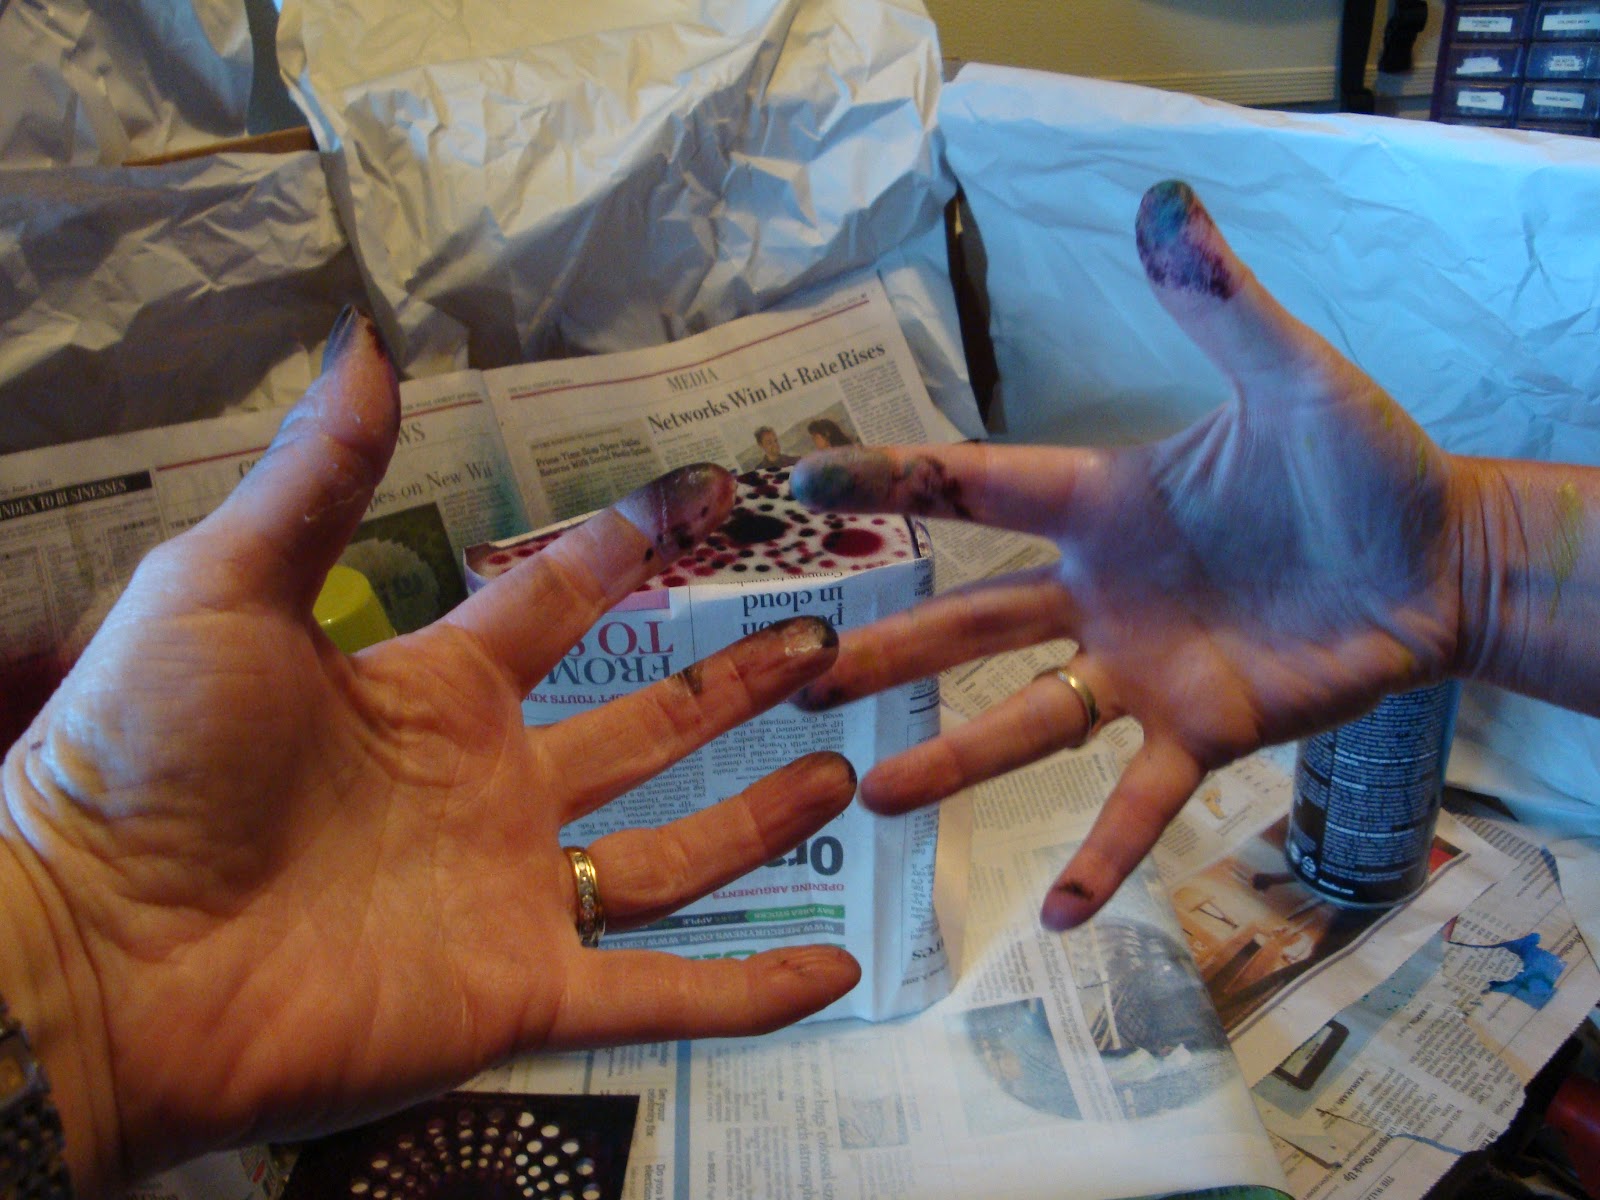
I added a few sprays of black paint as well. The photo above captures our home made spray booth and materials we used. My desk sorter is standing on end after being sprayed.
Note to self - next time wear gloves! The angle of the photo makes my hand look enormous next to Nancy's! For photos of Nancy's project: Squirrely Art. She may be posting her projects in the next day or so. For information on Maryjo McGraw and her secret blog:MaryjoMcGraw.blogspot.com.
First, I sprayed a clear desktop sorter with white spray paint. I did 2 light coats. I also sprayed a plastic tumbler that I use for water for paint brushes.
I really love this stencil and thought I would use it on my plastic pieces. Using painter's tape and newspaper, I masked off the portions I did not want to stencil. I used a red "stained glass" effect spray paint that Nancy brought over. I used the same stencil and paint color on my tumbler.
I added a few sprays of black paint as well. The photo above captures our home made spray booth and materials we used. My desk sorter is standing on end after being sprayed.
Note to self - next time wear gloves! The angle of the photo makes my hand look enormous next to Nancy's! For photos of Nancy's project: Squirrely Art. She may be posting her projects in the next day or so. For information on Maryjo McGraw and her secret blog:MaryjoMcGraw.blogspot.com.
Monday, May 14, 2012
For the Boys...
When my daughter was in high school (both kids actually), I would find some quirky odds and ends for stocking stuffers and Easter baskets. One year, I found the bank pictured below for her basket:
Over time, we would jokingly refer to "adding to the therapy fund" as things came up. Apparently, two of her college friends thought we had a "real" therapy fund. It is actually pretty funny, given both boys have spent time around Megan and I and know we have a rather obtuse sense of humor. So, I get a text that the boys think it is a real fund. So, I ask her if they are jealous. I receive a text back that they want their own. I had 3 days before going to Boston and could not find a bank of any kind. I did find metal canisters and devised a way to make them into banks. Add a couple of old Rubber Baby stamps, a Ken Brown/American Art Stamp and some letters...
Hope they are happy...otherwise, I will need to add to the fund...
Wednesday, February 1, 2012
Stamping Gear
I was watching a demonstration in the e.k. success booth at CHA that I thought was pretty clever. As a veteran of the many generations of stamp positioners, I know they came be tricky. Stamping the same image in a circle using a Positioner can take practice and some time to get right. Soon, you can purchase the Stamping Gear for some fun projects from scrapbooking to card making to canvas/wall art.
The above photo is of the Stamping Gear. It will retail for $39.99
The kit contains a circular gear, an oval gear, center pieces, a stamp handle and 4 sets of foam mounted rubber stamps. However, you could use any non-wood mounted stamp as long as it fits onto the stamp holder. I was thinking words and alphabet stamps might be fun.
Here are some samples in progress. You could stamp a scrapbook page, card, canvas, fabric, and wrapping paper. What do you think?
The kit contains a circular gear, an oval gear, center pieces, a stamp handle and 4 sets of foam mounted rubber stamps. However, you could use any non-wood mounted stamp as long as it fits onto the stamp holder. I was thinking words and alphabet stamps might be fun.
Here are some samples in progress. You could stamp a scrapbook page, card, canvas, fabric, and wrapping paper. What do you think?
Thursday, January 19, 2012
!2 x 12 Book
I had previously shown a small book I made from one sheet of 12 x 12 card stock. It is super simple - first take the card stock and score it at 3 inch intervals (at 3, 6 and 9 inches). Rotate the card stock and do it again. It is a bit hard to see (although I took the photo at an angle) that the entire sheet of card stock is scored into squares. For this next step, I leave the card stock in the scorer. Take an Xacto knife and cut down at the 3 and 9 inch marks - JUST THROUGH 3 OF THE Squares. So, you will cut on the score line down 9 inches. At the 6 inch score line you will cut in the opposite direction of the other two, again just to the 9 inch mark.
Once you have made your cuts, you can remove it from the score tool. I use the Martha Stewart scorer and leave on the card stock because I find it easier to make straight cuts. You will then start at one side and make a series of accordion folds up the row. When you come to the point where the squares are joined, fold on top of the next row and continue accordion folding.
When you have completed the folding, you will have accordion folds, and valley and mountain folds. It should look like the photo below:
You will then take the adhesive of your choice, and begin sealing the valley and mountain folds. Once those are closed, your book should look like an accordion book. You will be closing the accordion, by applying adhesive to the back side of the pages. The idea is to make a spine with the pages opening as a regular book.
As I am folding and gluing, I try to line the pages up as closely as possible and use my bone folder to smooth out the pages. In my next post, we will discuss the page decorations!
Once you have made your cuts, you can remove it from the score tool. I use the Martha Stewart scorer and leave on the card stock because I find it easier to make straight cuts. You will then start at one side and make a series of accordion folds up the row. When you come to the point where the squares are joined, fold on top of the next row and continue accordion folding.
When you have completed the folding, you will have accordion folds, and valley and mountain folds. It should look like the photo below:
You will then take the adhesive of your choice, and begin sealing the valley and mountain folds. Once those are closed, your book should look like an accordion book. You will be closing the accordion, by applying adhesive to the back side of the pages. The idea is to make a spine with the pages opening as a regular book.
As I am folding and gluing, I try to line the pages up as closely as possible and use my bone folder to smooth out the pages. In my next post, we will discuss the page decorations!
Tuesday, January 3, 2012
New Year
Happy New Year! It is that time of year when a resolutions abound. Last year, my crafting resolutions centered around clean up and organization. Although I had my moments (or, more likely, my weeks!) i did a decent job on keeping with the need to clean up after a project and putting tools and toys away after purchase/usage. I will continue to work on these this year.
I have discovered - more likely, admitted to myself....out loud...so I had to pay attention...that I indeed have too much card stock. Blasphemy to some, I know...but the evidence is spilling off the shelves. I guess that takes us to another goal - buy less and use more! I have already started to accomplish this - at least the "buy less"part! How did you do with last year's resolutions? Made any new ones for 2012? Do tell!
Monday, October 24, 2011
Done!
A couple of weeks ago, I completed some projects that were laying around awaiting the finishing touches. (I posted the Shadow box a couple of days ago.) Back at the end of July, I took a couple of Tim Holtz's classes when he was teaching in the San Jose area. Well, the largest of the projects has finally been completed. The great thing about this class and project was the variety of techniques it showcased. We used tapes, paints, alcohol inks, stains, embossing, chipboard, and metals. Most of the techniques were not new, but the class was a great reminder of using your materials!
We even added a cute (or so my friends think "creepy") little porcelain doll, and some fun gears and watch parts. If you have a chance to take this class, I highly recommend it!
Saturday, October 22, 2011
Shadow Box
Several months ago, there was much discussion on one of the on-line boards I subscribe to regarding Configurations boxes, Design team samples, etc. At that time, I had mentioned that you could probably make your own with chip board. Well, the above photo is of a box I crated using chipboard that I cut myself. it was a bit of a pain, but I wanted to see how it would all turn out. After painting it white, I set i aside for quite a few months. A couple of weeks ago, I was determined to complete that which i had started oh,so long ago!.
I used a couple of photos from a trip to Paris in 2009 (Moulon Rouge and 1920's art deco Metro sign). The rest of the backgrounds came from my stash of vintage french ephemera. The large Fleur de Lis was purchased at Les Puces flea market outside of Paris. A few stickers, cut-outs, and German Scrap completed the shadow box. I used a lot pop up dimensionals in the shadow box - unfortunately, there is no way to adequately photograph. So, my experiment worked - although it was no fun cutting the chipboard. So, you can "do it yourself" if you do not want to spend the money on a pre-made shadow box!
Thursday, October 13, 2011
Under the Sea
The last of the houses...The background paper has a variety of iridescent images that cannot be seen in the photo. I used bead gel along the bottom. Once it was dry, I colored/tinted it to look like sand.
This is the back side - inked up some raffia to look like seaweed!
Saturday, October 8, 2011
Once Upon a Time
One of the Scramp Camp attendees is a Snow White fan. A rather simple cottage for the dwarfs...
Speaking of dwarfs, here they are! The photo below is of the roof. I glued straw colored raffia to cardboard. Once dry, I sprayed the raffia with a couple of yellow tones of Glimmer Mists.
Thursday, October 6, 2011
Fun House
Posing a couple more of the houses I made for friends at Scramp Camp.
The above photo is of the fronts...
and the backs.
The above photo is of the fronts...
and the backs.
Friday, September 30, 2011
Fence Posts
Or, I should say, former wooden fence posts were what we used to make little goodies for our Scramp Camp attendees. KJ's wonderful husband (Mike) cut their old fence posts into wooden houses for us to decorate - specifically in the style/likes of one of the attendees. After washing and sanding, I used a coat of gesso to start with a more uniform background.
These were the fronts of 2 of the houses I made. The one on the left was for my friend Diane (lover of theatre and cats) and the one on the right for Maryjo. I layered old book and music pages, and added a bit of molding paste. After all was dry, I painted with acrylics. The door, fence, and roof are thin balsa wood. I found the chipboard windows at Alpha Stamps (they have great stuff - one of my favorite company's).
I even decorated the backs! You can see some of the texture better on the house on the right. The image on the left was from the Moulin Rouge patterned paper pad. I also used rubber stamps and ephemera to embellish the houses. It was quite addicting making these houses!
These were the fronts of 2 of the houses I made. The one on the left was for my friend Diane (lover of theatre and cats) and the one on the right for Maryjo. I layered old book and music pages, and added a bit of molding paste. After all was dry, I painted with acrylics. The door, fence, and roof are thin balsa wood. I found the chipboard windows at Alpha Stamps (they have great stuff - one of my favorite company's).
I even decorated the backs! You can see some of the texture better on the house on the right. The image on the left was from the Moulin Rouge patterned paper pad. I also used rubber stamps and ephemera to embellish the houses. It was quite addicting making these houses!
Sunday, September 25, 2011
Houses
Wow - it has been very busy around here! I had wanted to post earlier in the week, but did not have much time. I had a lot of fun making houses for Scramp Camp. These were from a Club Scrap kit in which you can put little battery operated lights.
The colors of these two houses were changed (somewhat) by a variety of color sprays (Adirondack, Glimmer Mist and Shimmering Rain). The red heart was made with the Red Queen in mind. Now, the green was actually made with my friend, Nancy, in mind. She is a big Wizard of Oz fan. You can see a bit of the Yellow Brick Road by the front door.
These are opposite side views of the houses and their inhabitants! These little houses are great fun - I am thinking of a little village, possibly, for Christmas!
The colors of these two houses were changed (somewhat) by a variety of color sprays (Adirondack, Glimmer Mist and Shimmering Rain). The red heart was made with the Red Queen in mind. Now, the green was actually made with my friend, Nancy, in mind. She is a big Wizard of Oz fan. You can see a bit of the Yellow Brick Road by the front door.
These are opposite side views of the houses and their inhabitants! These little houses are great fun - I am thinking of a little village, possibly, for Christmas!
Saturday, September 10, 2011
Halloween Treat Boxes
I will be teaching a Halloween Treat box class just in time for the holiday! It will be a quick one hour class at A Work of Heart Studio in Willow Glen.
The boxes are made from a large Accu-cut Die. We will be using card stock, pattern paper and home made baker's twine. The class will be Thursday, October 6th from 6:00 to 7:00pm. For more information, check out the website by clicking here.
Saturday, September 3, 2011
Textures
This post is a bit of a Scramp Camp tease! I have been working on some projects that I cannot share until after September 9th (the first day of Scramp Camp). The photos are a bit fuzzy as I had to get a close-up so as not to give anything away!
This is a portion of one of the projects - taken from the front. You may be able to recognize the textures.
This may be a little tougher to decipher! It is taken from above. Let me know your guesses!
This is a portion of one of the projects - taken from the front. You may be able to recognize the textures.
This may be a little tougher to decipher! It is taken from above. Let me know your guesses!
Saturday, May 28, 2011
Notecard Keeper
I changed a recent Club Scrap project into a note card keeper. The actual purpose of this Comics project is as a card keeper.
It contains 16 note cards to be used. I stamped the greeting and layered it over embossed card stocks. I sent this out to a friend for a charity event. It makes a great little gift if you fill it with usable note cards or fold over cards.
Friday, May 13, 2011
Button Fairies
A few of West Coast Scrappers have been playing around with making button fairies. I stamped up a body and made the "tail" a couple of weeks ago. I recently had time to complete it.
This is a great technique to use up all those buttons we tend to accumulate. I purged my buttons last year, but saved a few of the bigger ones for a project. They worked perfectly. I added a teapot charm to the bottom.
This came together pretty quickly and easily. I think you could make a variety of sizes, depending upon your stash of buttons.
This is a great technique to use up all those buttons we tend to accumulate. I purged my buttons last year, but saved a few of the bigger ones for a project. They worked perfectly. I added a teapot charm to the bottom.
This came together pretty quickly and easily. I think you could make a variety of sizes, depending upon your stash of buttons.
Monday, May 2, 2011
Finishing Projects
Today was a productive day! Not only did I clean my room, I was able to finish some projects. I have been avoiding going into my studio art room, as the need to clean thoroughly bummed me out (said in my best surfer voice!). A clean space is definitely conducive for art. I was able to finish a Club Scrap project I had started a couple of weeks before. It is a perpetual calendar that helps keep track of birthdays/anniversaries etc...
The papers are all from Club Scrap's Solstice kit. I die cut the flowers using a variety of flower dies - and a couple of punches. Next step is to fill in the dates! The sentiment was stamped - and the leaves were embossed with an embossing folder. I cut it out - the embossed surface was inked to add dimension. So easy - give it a try!
Subscribe to:
Posts (Atom)