Color! It is so important in our art, be it scrapbooking, stamping, mixed media, ATC's, etc. If you are anything like me, you probably have a myriad of papers, card stocks, inks, paints etc in a variety of color. I have lists of ink pad colors, but I don't have information on all my paints and mists. I have been thinking of organizing a color notebook for a long time (read 3-4 years!). I also tend to pull ads, magazine photos, etc for color combinations. Well, I have snuck some time away from class samples and Scramp Camp preparations and began a color notebook.
I glued the color inspiration that I have removed from magazines etc and glued them into a notebook. My next step is to catalog the paints, inks, chalks (everything but pens). I am hoping it will help me use what I have - and not buy duplicates! How do you organize your materials?
Tuesday, August 30, 2011


Thursday, August 25, 2011
Time Flies
Wow, this month is just flying by! I have a lot going and not enough time. I would love to be able to share some of the projects I have been working on, but they are for our West Coast group's Scramp Camp retreat. They will be a surprise for the attendees...so...no posting! I will be photographing them and will post after the second weekend in September.
I did sneak in a bit of other playtime by doing mail art. I have a bit of a wacky sense of humor, and I tend to express it in my art journals and mail art. This was one of my favorite juxtapositions:
 I have a lot of scenic stamps (well, a lot of all stamps really) . I also tend to buy images in varying sizes. I mixed a couple of "normal" stamps in an unusual way, and came up with the above postcard. The saying is one that seems so appropriate these days! Next time you are playing (with no specific project in mind) try mixing and matching your images for a fun twist!
I did sneak in a bit of other playtime by doing mail art. I have a bit of a wacky sense of humor, and I tend to express it in my art journals and mail art. This was one of my favorite juxtapositions:

Tuesday, August 23, 2011
Pre-empted by Real Life
Wow - it has been quite awhile! Real life has pre-empted all else these days. However, both kids are back at college; class samples are in progress; Scramp Camp art retreat is well into the planning and purchasing stages; and car will be fixed up in September. I will be heading to Boston at the end of the month to move my daughter into her apartment (with her roommate and her family). The car - well, I was rear-ended by a delivery truck on the freeway. Thankfully, it was not serious; although, I was sore for several days.
During this hiatus, I have been doing some planning. But, it is not the same as getting into the paints, stamps, inks, etc. When real life gets in the way, do you miss making art? I have a lot of projects lined up, so planning and sketching will help when I get to them.
I did get some mail art made and sent to friends (and completed the Summer PSL). A great starter for mail art (and can be used for greeting cards) is a purchased postcard. I stamped and cut out some images, and then added them to the post card.
 This was sent to my friend Sherry in Indiana. I should be able to return to normal posting soon...
During this hiatus, I have been doing some planning. But, it is not the same as getting into the paints, stamps, inks, etc. When real life gets in the way, do you miss making art? I have a lot of projects lined up, so planning and sketching will help when I get to them.
I did get some mail art made and sent to friends (and completed the Summer PSL). A great starter for mail art (and can be used for greeting cards) is a purchased postcard. I stamped and cut out some images, and then added them to the post card.

Thursday, August 4, 2011
Mini Book a la Tim


Tuesday, August 2, 2011
Tuesday's Tip
This past weekend, I took 2 Tim Holtz classes at the local scrapbook store. They were tons of fun (it had been awhile since I last saw Tim and Mario). They were project and technique classes. Although nothing was completely new, I did learn a couple neat tricks. Plus I was reminded of a few tips I had forgotten.
In both classes, we used some Distress Stickles and Glossy Accents. The GA bottle I was to use was completely plugged - nothing was coming out. Thankfully, I had an awl to unclog it. We discussed how frustrating it can be to reach for glues, only to find that they are plugged. One tip Tim shared (and I read this a while ago): when you are done applying your glue, tap the bottom of the glue bottle down on the table when you set it down. Do not slam it down on the table, just a firm tap and then re-cap the bottle. You have now helped the glue to settle back down into the bottle, clearing the tip. And, it should be clog free and ready to go for the next use!
In both classes, we used some Distress Stickles and Glossy Accents. The GA bottle I was to use was completely plugged - nothing was coming out. Thankfully, I had an awl to unclog it. We discussed how frustrating it can be to reach for glues, only to find that they are plugged. One tip Tim shared (and I read this a while ago): when you are done applying your glue, tap the bottom of the glue bottle down on the table when you set it down. Do not slam it down on the table, just a firm tap and then re-cap the bottle. You have now helped the glue to settle back down into the bottle, clearing the tip. And, it should be clog free and ready to go for the next use!
Saturday, July 30, 2011
Getting Back
I am trying to get back into the "swing of things" i.e. blogging. It is funny when you take a hiatus from something - blogging, working out, creating, etc - it is so difficult to get back into it? I know it is worse for me when it comes to blogging and working out! The good news is that I have been getting some creative time in.
With Summer PSL, I have been scrapping a bit more. I have some fun other projects on the back burner while I do a bit of scrapping and card making for my teams (although not a lot of that is being accomplished!). I did finish a fun Halloween page for my daughter's album. She was Micheal Jackson in her 7th grade year. They were allowed to dress up at school - it was quite the hoot. She was unrecognizable - so it did freak out a couple of teachers who thought she was absent - until they heard her voice announcing her presence!

I used one of the wonderful Halloween stamp sets from Artistic Outpost. One of my favorite, and very old, techniques is mixing ink colors on the stamp. I used India Ink Black and Adirondack Bright Orange on one of the Jack O' Lanterns and on the title. It is super easy. Ink you stamp with the lightest color, then add little touches of the darker color. It is not an exact science, so you can get slightly different effects each time:
 It looks better in real life - adding depth to the title. (And, yes, I am scrapping photos from 2002 - I am that far behind!) Give it try - if you have not already!
With Summer PSL, I have been scrapping a bit more. I have some fun other projects on the back burner while I do a bit of scrapping and card making for my teams (although not a lot of that is being accomplished!). I did finish a fun Halloween page for my daughter's album. She was Micheal Jackson in her 7th grade year. They were allowed to dress up at school - it was quite the hoot. She was unrecognizable - so it did freak out a couple of teachers who thought she was absent - until they heard her voice announcing her presence!


Wednesday, July 27, 2011
MIA
Yes, I am still around - just missing in action. Real life became oh so busy - a couple of days in San Francisco for "Billy Elliot"(fantastic show), SFMOMA for the Stein exhibit (excellent) and a lot of time with friends and family. As much as I have been enjoying myself, I have felt guilty to have let my blog posts lapse. I have been busy with creating, and I will share some of the things going on.
This coming Sunday, July 31st, I will be teaching a beginning Scrapbook class at A Work of Heart. This will class will be re-vamped in the future since the 6 page ALSB kits will no longer be available. The kit I will be using is Calypso:
 I will also be teaching another card class using Distress Stains and Stencils. I changed it up a bit after my June class. The card stock is from the Welcome kit:

This coming Sunday, July 31st, I will be teaching a beginning Scrapbook class at A Work of Heart. This will class will be re-vamped in the future since the 6 page ALSB kits will no longer be available. The kit I will be using is Calypso:


Tuesday, July 19, 2011
Tuesday's Tip
I have been making a lot of cards as a gift for my mom to use. A quick and easy background that I like to use is embossed panels. I have a bunch of folders from a variety of manufacturers. Every now and again, I cannot seem to find exactly what I am want/need for a particular design. Sooo...I die cut/punch out shapes out of cereal box (or plain cardboard - not too thick). Glue the shapes to a larger piece of cardboard in the size you would like. Once the glue is dry, place your card stock over the panel, create your "sandwich" and run through your Sizzix or Cuttlebug. You may need to use an embossing pad depending on your sandwich. Easy peasy!
Saturday, July 16, 2011
Shhh don't tell...
my mom, but this first weekend of Club Scrap's PSL I made cards for my mom. She is no longer venturing out and is in need of some cards to send out. So, I have been stamping up some cards to put into a recipe box to give her.
![]()
![]() Thankfully, I had plenty of ribbon and fibers to use, as it is Fiber Challenge week in PSL.
Thankfully, I had plenty of ribbon and fibers to use, as it is Fiber Challenge week in PSL.


Thursday, July 14, 2011
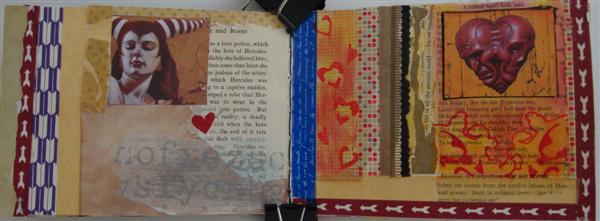
Journal Pages...

Tuesday, July 12, 2011
Tuesday's Tip
This week, Club Scrap's Pro Scrapbooking League begins its summer camp. Once again, I signed up for card and scrapbook teams. The challenge this week is to use fibers/ribbon. I generally have no trouble with this challenge as I do have a lot of fibers and ribbons. The challenge for me is to use them in different ways.I sometimes have these little pieces of ribbon left over - not enough to wrap a card or tie a bow. Sometimes, I toss them out. And sometimes, I save them for something. Here's an idea: use a variety of shorter pieces as a center for a die cut flower! I am sure there are other similar uses on die cut and punched shapes. I came across this usage in a Paper Crafts magazine. I'll be giving this a try - how about you?
Saturday, July 9, 2011
Card Challenge
Since our little "Squirrely Challenge" group is on Summer hiatus, I thought I might participate in some of the Club Scrap challenges to keep me in "card making" shape. The card below was created using the specified kit (Mosaic Twist). Since it has been so hot around here (we went from cool and rainy to 90-100 degree temperatures!), I thought a nice tropical, umbrella drink might be in order...
![]() Do hit a lull in creating during the warmer, Summer months? If so, what do you do; shelve the supplies or find inspiration?
Do hit a lull in creating during the warmer, Summer months? If so, what do you do; shelve the supplies or find inspiration?

Thursday, July 7, 2011
A Little Journal Page
I was going through some magazines, pulling out information and tossing the rest. I came across a card with circles and butterflies. Pretty simple - so it came to mind to do a journal page. I love being able to take ideas from one medium to another. I had a partially completed page next to a blank and thought I would use the blank side. Well...it ended up a bit different than I originally planned. And, it became a 2 page layout.
Below is the left side - I added the circles, saying and flower cut out today:
![]() The image below is the right side that I completed today. I used watercolor crayons and stencils on the background. I stamped the circles with Distress Inks. The images are from Helga Strauss (the Art Chick) - they were in a Stampington publication.
The image below is the right side that I completed today. I used watercolor crayons and stencils on the background. I stamped the circles with Distress Inks. The images are from Helga Strauss (the Art Chick) - they were in a Stampington publication.
![]() And, the two pages together:
And, the two pages together:
![]() Both pages came together quickly. What have you used for inspiration?
Both pages came together quickly. What have you used for inspiration?
Below is the left side - I added the circles, saying and flower cut out today:


Tuesday, July 5, 2011
Tuesday's Tip
I have been busy with stencils lately. Most of the stencils I use I have bought from companies like Club Scrap and Crafter's Companion. However, packaging can also act as a stencil. The packages from chip board letters and shapes can act as a stencil. You can use the negative space to draw through. The negatives from punched papers can also be used!
Saturday, July 2, 2011
Stains/Stencils Class


Some of the ladies with their favorite completed card. Many had never made a paper card before this class.


Thursday, June 30, 2011
It's Elemental..
I have completed that last 2 ATC's of this round of our science geek Periodic Table of the Elements ATC's. I posted Lithium a while back. The first one is Barium. The "drape" does lift up, but I will leave the details to your imagination!
![]() This next one is also interactive. It is Iron:
This next one is also interactive. It is Iron:
![]() The scroll work is a gate that opens in the center. Below is the opened card:
The scroll work is a gate that opens in the center. Below is the opened card:
![]() No, it is not the Robert Downey Jr Iron Man (Iron is not red, unless it is rusty!). I found a more appropriately colored image on the Internet. However, I did use "Rusty Hinge" Distress Ink to sponge around the edges! Just a bit of fun stuff before the weekend!
No, it is not the Robert Downey Jr Iron Man (Iron is not red, unless it is rusty!). I found a more appropriately colored image on the Internet. However, I did use "Rusty Hinge" Distress Ink to sponge around the edges! Just a bit of fun stuff before the weekend!


Tuesday, June 28, 2011
Tuesday's Tip
I was making a few birthday cards. I started thinking about the process - decision paper, stamp, color etc. How do put together a card? I usually pull my colored card stock and mats first. Then, I choose focal images and sentiments. This works great if I am coloring in images or using colored inks since my color palette has been established.
Sunday, June 26, 2011
Smash Book Part 2
As I mentioned in the previous post, I decided to make my own version of the Smash Book by K&Co. I used materials I already had. After cutting the cover and pages, I added 4 divider pages (cut from Club Scrap card stock) and 4 pocket pages. I also stamped and punched out tabs for each divider.
![]() I pulled out my Bind-It-All and a length of coil. After deciding on the number of holes/length of binding, I punched away. I had not realized how many pages I was cutting - so the book is quite thick! I quickly decided to add a bit to the cover with decorative tape and rubber stamping. The above photo is of the closed, completed book.
I pulled out my Bind-It-All and a length of coil. After deciding on the number of holes/length of binding, I punched away. I had not realized how many pages I was cutting - so the book is quite thick! I quickly decided to add a bit to the cover with decorative tape and rubber stamping. The above photo is of the closed, completed book.
![]()
![]() When opened, you can see the divided sections and tabs. On the back cover, I attached ribbon to make a pen holder. The ribbon is attached with 2 small brads. To cover the backside of the brads, I made a vertical pocket for miscellaneous stuff. I think this is an easily translatable project. You can make journal, sketch books, appointment books etc. Many of you probably have the materials you need on hand.
When opened, you can see the divided sections and tabs. On the back cover, I attached ribbon to make a pen holder. The ribbon is attached with 2 small brads. To cover the backside of the brads, I made a vertical pocket for miscellaneous stuff. I think this is an easily translatable project. You can make journal, sketch books, appointment books etc. Many of you probably have the materials you need on hand.


Saturday, June 25, 2011
A Smash What?
Recently, someone in my West Coast Scrap group posted information and a video link to something called a "Smash Book". When I checked it out, it was a spiral bound journal with pre-decorated pages. Seems it has become popular - with its own line of accessories. So...as a maker of books/journals, I thought it would be pretty easy to make one.
![]() I took two 8 1/2 x 11 pieces of cardboard (the type that comes in packages of paper/card stock so that it can not be bent) and cut them to a 4 1/2 x 6 inch size. Pretty easy and basically cheap!
I took two 8 1/2 x 11 pieces of cardboard (the type that comes in packages of paper/card stock so that it can not be bent) and cut them to a 4 1/2 x 6 inch size. Pretty easy and basically cheap!
![]() I went through my stash of decorative papers and pulled out a few. I stayed with a fairly neutral color scheme, with minimal design. I figure I might want to throw it in my purse for ideas, journaling, etc. I also cut some Wausau card stock for plain pages.
I went through my stash of decorative papers and pulled out a few. I stayed with a fairly neutral color scheme, with minimal design. I figure I might want to throw it in my purse for ideas, journaling, etc. I also cut some Wausau card stock for plain pages.
![]() Finally, I cut my pages to size. I stenciled a few of the white pages (using ink and Glimmer Mist). This took me about an hour to decide on papers, decorate, and trim.
Finally, I cut my pages to size. I stenciled a few of the white pages (using ink and Glimmer Mist). This took me about an hour to decide on papers, decorate, and trim.
Stay tuned for the completed book.


Stay tuned for the completed book.
Thursday, June 23, 2011
Button,Button...

Tuesday, June 21, 2011
Tuesday's Tip
For someone who was not really interested in die cuts, I seem to have a lot dies! And, I have been using them regularly for cards and scrapbook pages. I have a few that have small pieces/windows. Sometimes it is difficult to get the paper to release without tearing. I recently read that rubbing the metal cutting portion of the die with wax paper helps to release the paper. I have to say it works great! If you have the same issues with your dies, give it a try. You may want to do it every 3-4 cuts.
Sunday, June 19, 2011
Distress Stains and Stencils Part 2
After making cards with the Distress Stains ans stencils, I thought I would play on my journal. Of course, the final outcome was not quite what I had originally had in mind! I used 2 colors of Distress Stains on my background - then stenciled the numbers. Then, after a bit of stamping I had a very busy background. I added some Washi tape and vellum, more stamping and a focal image:
![]()
You can click on the image to enlarge it. It is a bit of a commentary on having both kids home from college this summer. I do love it when I can use techniques on a multitude of projects!

Thursday, June 16, 2011
Stains and Stencils
I have been enjoying playing with Distress Stains and stencils. In addition to the myriad of stencils from Club Scrap, I have quite a few from Crafter's Companion. At the end of June, I will be teaching this class at A Work of Heart. I thought that some of the Distress colors would work well with Club Scrap's Raku kit.
![]() In addition to stencils, I lightly stamped a cluster of butterflies in the background. I added a punched greeting and a couple of die cut butterflies.
In addition to stencils, I lightly stamped a cluster of butterflies in the background. I added a punched greeting and a couple of die cut butterflies.
![]() The number and clock stencil needed a little extra care in applying the stain. Some of the graphics have small cuts that would be easy to bend/break if you are heavy handed with the stain applicator. In the class, we will be making a 12 x 12 background that will be cut to make 6 cards (with some leftover pieces).
The number and clock stencil needed a little extra care in applying the stain. Some of the graphics have small cuts that would be easy to bend/break if you are heavy handed with the stain applicator. In the class, we will be making a 12 x 12 background that will be cut to make 6 cards (with some leftover pieces).


Tuesday, June 14, 2011
Tuesday's Tip
I often use a variety of dies with my Sizzix Big Shot. It's one of my favorite embellishing tools. Some dies are larger platform style that makes stacking pretty easy. However, I do have some thin metal shapes from Nestibilities and PaperTreyInk. They need a slightly different storage system. How do you store them? I found that using magnetic frames keeps them handy. You can also store them according to manufacturer.
Sunday, June 12, 2011
A Few Changes...
I just wanted to take a few moments to let you know of some changes to my blog. They are pretty minor and may not affect many of you. If you are having trouble subscribing with Google, Yahoo or some of the other options, I have added a "Subscribe by e-mail" box on the left. Also, as I mention earlier, i will be teaching classes using Club Scrap products (as well as many others) at A Work of Heart in San Jose. I have a direct link to A Work of Heart on the right (the row of houses). I will also be posting the upcoming classes just below the link.
If you are not a Club Scrap member or are curious, you may want to come to a class. You will learn something new and have the opportunity to work with and view the wonderful products. As always, any comments or suggestions are welcome!
If you are not a Club Scrap member or are curious, you may want to come to a class. You will learn something new and have the opportunity to work with and view the wonderful products. As always, any comments or suggestions are welcome!
Saturday, June 11, 2011
Unofficial Start of Summer
The calendar and the weather may not scream "summer", but having the kids home from school is my indication. Although my "kids" are college students in their 20's, I still have a transition with having them home for the summer. That transition includes laundry (!), ground rules for being home and storing dorm paraphernalia. So, my creative time has been missing this particular 7-10 days. I have done a few minor projects (that need posting), but my time has been lacking. Do you have similar issues this time of year?
The hardest part for me in weathering a lack of time is staying motivated. Must keep the muse alive! I have been cruising blogs in the evening and reading magazines. I generally have a post-it notes or a notebook to jot down ideas that reading will spark. I generally purchase magazines at my book store - that way I can decide if the issue appeals to me. I decided after buying it bi-monthly, I would subscribe to CLothPaperScissors. I went on-line to subscribe and found a fabulous interactive website with free downloads and a wonderful newsletter. Talk about keeping the muse alive - check them out here. Another fun website is Strathmore paper site. They have free art journaling classes from wonderful instructors. i love to look at the finished pages! You can see what they have to offer here.
The hardest part for me in weathering a lack of time is staying motivated. Must keep the muse alive! I have been cruising blogs in the evening and reading magazines. I generally have a post-it notes or a notebook to jot down ideas that reading will spark. I generally purchase magazines at my book store - that way I can decide if the issue appeals to me. I decided after buying it bi-monthly, I would subscribe to CLothPaperScissors. I went on-line to subscribe and found a fabulous interactive website with free downloads and a wonderful newsletter. Talk about keeping the muse alive - check them out here. Another fun website is Strathmore paper site. They have free art journaling classes from wonderful instructors. i love to look at the finished pages! You can see what they have to offer here.
Tuesday, June 7, 2011
Tuesday's Tip
I have been playing around with some of the Tim Holtz house dies. They are really pretty versatile - and work well with a variety of card stock and papers. When using the moving and shaper for windows, there tend to be a lot of little pieces that get stuck in the die. have you had this happen with some of your dies? I recently read a tip that suggests using a lint roller to pick up the little pieces. So, I gave it a try - it worked wonderfully!
Sunday, June 5, 2011
Busy Busy
I have been a bit remiss in posting lately. Mainly due to the preparation for my upcoming classes at A Work of Heart in San Jose. The first class is scrapping - the basics in a mini booklet and the creation of a 6 page layout. I am using Club Scrap's Sales Team special "Cobblestone". The first 2 pages are pictured below:
 I thought the colors would be versatile for the activities in June - Father's Day and graduations. Color can be added with fun embellishments based upon the layout usage.

Thursday, June 2, 2011
Gel Pens and Watercolor Crayons
I am still busy with tons of projects - class samples, graduation cards,button fairies, and ATC's for my ongoing "Elements" swap. I recently completed one of the three elements to which I have committed. The background was created using a stencil that I colored with Glaze gel pens. After the ink dried, I colored with watercolor crayons, blending with a damp towel. The Glaze marks create a resist with the watercolor. I have been enjoying playing around with this combination.
 NOTE: This is not meant to be insensitive to those taking lithium or those with psychological issues. I really just wanted to use these 2 stamps together for Lithium.

Tuesday, May 31, 2011
Tuesday's Tip
I have a bunch of old photos that belonged to my mom and my grandmother. You know, the old black and white 3 x 5's with white border. My mom and I sorted through them to be sure of names and dates. Thankfully, quite a few had all the information written on the back by my grandmother. When I scrap these photos, I plan to photocopy the backs of the photos to add my grandmother's notes (in her handwriting) to the layout. Give it a try as a fun addition,
Saturday, May 28, 2011
Notecard Keeper


Thursday, May 26, 2011
Squirrely Challenge
This week's Squirrely Challenge was a pop up card. It was a very easy pattern to follow from Splitcoaststampers.com. I used the stamps and card stocks from Blossom. I thought it would make for a cheery card.
 This the card folded up, as if to fit into an envelope. Although it may not look it, it is a standard A2 card.
 This photo is of the open card - or, I should say "popped up". Remember to visit the other "Squirrel Girl" blogs this week for other variations:
Nancy's blog; Jen's blog; Chrissie's blog; Julie's blog; and Diana's blog. Enjoy!

Nancy's blog; Jen's blog; Chrissie's blog; Julie's blog; and Diana's blog. Enjoy!
Tuesday, May 24, 2011
Tuesday's Tip
It will soon be time to scrapbook - Summer PSL usually begins in July. I find that I have been much more productive. My secret? I match my photos to previously ALSBed kits. I put the photos and the layouts in the same page protecters. I can then grab the page protecters I want to scrap. For those photos I have a particular kit in mind, I place a note into the page protecter with the name of the kit. This is a huge time saver.
Monday, May 23, 2011
Squirrely Challenge
Well, I am posting a bit later than normal. The Club Scrap Die Cut Blog Hop and real life have taken up some of my time. Last week's challenge was from October 2010 Technique Junkies newsletter - Cute Cuts. I used the Cuttle Bug Happy Birthday embossing folder with Club Scrap's Welcome kit.
 I think a more simple folder would have been better.

Saturday, May 21, 2011
Die Cut Blog Hop


http://www.pagesofpictures.com/
http://chrissiecreations.blogspot.com/
http://scraphappysistersink.blogspot.com/
http://www.capecodscrapper.blogspot.com/
http://www.creatingwithconnie.blogspot.com/
http://www.scrappingthoughts.com/
http://orezonia.blogspot.com/
http://squirrelyart.blogspot.com/
http://wbellino.blogspot.com/
http://craftchaos.blogspot.com/
Enjoy the creativity!
Friday, May 20, 2011
Blog Hop

Tomorrow, May 21st, several Club Scrappers are participating in a Blog Hop. Come by and check out the art!
Wednesday, May 18, 2011
New Partnership
So, it is now time to stop the teasing and make my big announcement! Starting in June, Creating with Connie will be partnering with A Work of Heart art studio in San Jose! I am heading back into teaching, which is a very exciting and fun exercise. Classes will cover the paper arts - scrapbooking and stamping classes will be held this summer. Andrea already has a full schedule; however, we were able to squeeze in a few classes.
And, yes, I will using the fabulous Club Scrap products! So, if you have been wanting to check out Club Scrap in person (but did not want to host a party), now is your opportunity. To learn about A Work of Heart, visit them at AWorkofHeart.com. Hope to see you there beginning in mid-June!
And, yes, I will using the fabulous Club Scrap products! So, if you have been wanting to check out Club Scrap in person (but did not want to host a party), now is your opportunity. To learn about A Work of Heart, visit them at AWorkofHeart.com. Hope to see you there beginning in mid-June!
Tuesday, May 17, 2011
Tuesday's Tip
While making a bunch of simple cards, I was using a couple of my favorite embossing folders. As we all have figured out, there is a front side to the folders. However, sometimes the reverse image can be just as decorative. I have a retro circle folder that has interlocking circles on the correct side. However, the reverse has cool looking diamond shapes - also retro. Next time you are using your embossing folders, think of using the reverse for more mileage from your folder!
Monday, May 16, 2011
A Little Something for Charity

Saturday, May 14, 2011
Upcoming Announcement
Yes, I am being a bit of a tease! I am finalizing some details, but I will have a big announcement in the coming week. Stay tuned!
Friday, May 13, 2011
Button Fairies
A few of West Coast Scrappers have been playing around with making button fairies. I stamped up a body and made the "tail" a couple of weeks ago. I recently had time to complete it.
 This is a great technique to use up all those buttons we tend to accumulate. I purged my buttons last year, but saved a few of the bigger ones for a project. They worked perfectly. I added a teapot charm to the bottom.
 This came together pretty quickly and easily. I think you could make a variety of sizes, depending upon your stash of buttons.


Wednesday, May 11, 2011
Squirrely Challenge
This week's Squirrely Challenge is Technique Junkies Bohemian Layers. I used Club Scrap's Blossom kit for this card. The technique uses 3 shades of the same color ink applied with a brayer over heat embossed images.
 I applied the inks in a circular pattern, rather than linear, with the lightest color in the center. To see other interpretations of this technique, visit the blogs of the other "Squirrel Girls":
Nancy , Jen, Chrissie, Diana, and Julie.

Nancy , Jen, Chrissie, Diana, and Julie.
Subscribe to:
Posts (Atom)