Monday, October 31, 2011
Happy Halloween
Hope you all enjoy Halloween - watch out for the little guys trick-or-treating.
 I was Art Journaling Friday and Sunday, then at a Recruit Event for Emerson College (my daughter's school). So, I will be finishing some pages and will be posting later this week. Until then, here's a bit of "Nightmare before Christmas" love...


Tuesday, October 25, 2011
Tuesday's Tip
I love using a wide variety of ink pad colors. Heaven knows I have more than a few different brands and a wide variety of colors. Sometimes, the color I stamped with is just a little too light to get good details of an image or single word. I will usually start over - but if you are near completion it can be a major pain. So, recently, I stamped an image in Cloud Blue Adirondak that was a bit too light. The edges seemed to fade into the card stock. I still liked the look, but felt it needed definition. I did not want to over stamp with a darker color because it would change the design. So, I tried outlining with a thin lined marker in a similar color - just a little darker. I did use a light touch - and it looked great! No re-stamping necessary. If you have a problem with too light a color, try outlining with a shade darker!
Monday, October 24, 2011
Done!
A couple of weeks ago, I completed some projects that were laying around awaiting the finishing touches. (I posted the Shadow box a couple of days ago.) Back at the end of July, I took a couple of Tim Holtz's classes when he was teaching in the San Jose area. Well, the largest of the projects has finally been completed. The great thing about this class and project was the variety of techniques it showcased. We used tapes, paints, alcohol inks, stains, embossing, chipboard, and metals. Most of the techniques were not new, but the class was a great reminder of using your materials!
 We even added a cute (or so my friends think "creepy") little porcelain doll, and some fun gears and watch parts. If you have a chance to take this class, I highly recommend it!

Saturday, October 22, 2011
Shadow Box

I used a couple of photos from a trip to Paris in 2009 (Moulon Rouge and 1920's art deco Metro sign). The rest of the backgrounds came from my stash of vintage french ephemera. The large Fleur de Lis was purchased at Les Puces flea market outside of Paris. A few stickers, cut-outs, and German Scrap completed the shadow box. I used a lot pop up dimensionals in the shadow box - unfortunately, there is no way to adequately photograph. So, my experiment worked - although it was no fun cutting the chipboard. So, you can "do it yourself" if you do not want to spend the money on a pre-made shadow box!
Thursday, October 20, 2011
Tuesday's Tip...?
With all the travel, I have indeed missed Tuesday's Tip. So..this week in will be Thursday's Tip!
Banners have been very popular of late. Several companies make die cut dies, punches and stamp sets to tickle your fancy. And, yes, I have several products myself. Remember, banners can have a variety of hangers. I have seen mostly paper and ribbon, but keep in mind Baker's twine (store bought or home made), waxed linen thread, hemp twine (for a rustic look), wires of various colors and widths, and chains can all add a distinctive look to your banner. The width of the material will depend upon the type/size of your banner.
Banners have been very popular of late. Several companies make die cut dies, punches and stamp sets to tickle your fancy. And, yes, I have several products myself. Remember, banners can have a variety of hangers. I have seen mostly paper and ribbon, but keep in mind Baker's twine (store bought or home made), waxed linen thread, hemp twine (for a rustic look), wires of various colors and widths, and chains can all add a distinctive look to your banner. The width of the material will depend upon the type/size of your banner.
Wednesday, October 19, 2011
October has been a crazy and busy month these past 2 years. In addition to Parent's Weekend at my daughter's school, I have been attending Club Scrap's Retreat. This year was no different!
Overall, it was a fun time - especially the time spent with friends that I do not have the opportunity to see in person unless at this Retreat! Also made a few very fun new friends! I must say that the projects were only so-so - my opinion. Thankfully, that meant my credit card remained warm and dry inside my wallet. There is usually a technique class at the Retreats (at least these 2 I attended). Since I have been stamping over 20 years, the techniques shown were not new. Unfortunately, I am not at liberty to share any specifics until sometime next week. When my projects arrive in the mail, I will post them and you can see for yourself.
For me, the joy is in seeing and spending time with the friends who live outside California. Plus, although I would not make additional projects, it is always good to try something new!
Overall, it was a fun time - especially the time spent with friends that I do not have the opportunity to see in person unless at this Retreat! Also made a few very fun new friends! I must say that the projects were only so-so - my opinion. Thankfully, that meant my credit card remained warm and dry inside my wallet. There is usually a technique class at the Retreats (at least these 2 I attended). Since I have been stamping over 20 years, the techniques shown were not new. Unfortunately, I am not at liberty to share any specifics until sometime next week. When my projects arrive in the mail, I will post them and you can see for yourself.
For me, the joy is in seeing and spending time with the friends who live outside California. Plus, although I would not make additional projects, it is always good to try something new!
Sunday, October 16, 2011
A New Journal
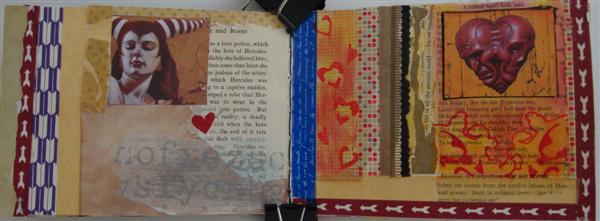
I have entered into a journal exchange with someone I met at a Kelly Kilmer class. Kate and I were chatting about exchanges - she had some bad luck in swap recently. It had been awhile since I participated in an art journal exchange, so I suggested we give it a try. Our first pages were to tell a bit about ourselves. I am not a writer. I do not diary/journal like that. I do use visual imagery. Sometimes, I add words or quotes. That is the closest I get to writing. So, of course, I went the visual route with my exchange page. The first page:
 This page represents how most people probably see me. My family is a big part of my life - particularly since I retired from my profession when we began relocating with my husband's company. The page opens to:
 This is my inner little devil - the one who loves the quirky, the odd, the dark....


Saturday, October 15, 2011
Canvas Class

I mixed a couple of colors as a base coat of red. Then mixed a couple of different greys, adding a little green to the darker bottom color. The images were added next. I ended up keeping them linear. I finished by embellishing with gold pearl string, gold rhinestones, and a little sponging of gold paint!
Thursday, October 13, 2011
Under the Sea


Tuesday, October 11, 2011
Tuesday's Tip
I am a little late in posting - too busy getting ready to fly out to Wisconsin for Club Scrap's Retreat! I did finish up some projects - mostly finishing touches. This had me thinking of color use. To get colors to pop on your card, collage, journal page, etc, use a little of your main color's complement. Some great color combinations are yellow and purple and blue and orange. Do not mix the colors together - just a dabs as finishing touches. (blending will make mud!)
Saturday, October 8, 2011
Once Upon a Time


Thursday, October 6, 2011
Fun House
Posing a couple more of the houses I made for friends at Scramp Camp.
 The above photo is of the fronts...
 and the backs.


Tuesday, October 4, 2011
Tuesday's Tip
I am a little later than usual with Tuesday's Tip. I have been a bit out of sorts for a variety of reasons - and it is definitely hampering my creative side. Know what I mean? What do you do to get back in the groove?
I am finding that scheduling creative time - specifically on the calendar - helps get me going. With all the traveling I had been doing (with most of October being the same), I like to break up my reading with magazines. Looking for inspiration, ideas, and techniques to get me back to creating. I do think getting back into my normal (now disrupted) routine will be huge. Any thoughts?
I am finding that scheduling creative time - specifically on the calendar - helps get me going. With all the traveling I had been doing (with most of October being the same), I like to break up my reading with magazines. Looking for inspiration, ideas, and techniques to get me back to creating. I do think getting back into my normal (now disrupted) routine will be huge. Any thoughts?
Friday, September 30, 2011
Fence Posts
Or, I should say, former wooden fence posts were what we used to make little goodies for our Scramp Camp attendees. KJ's wonderful husband (Mike) cut their old fence posts into wooden houses for us to decorate - specifically in the style/likes of one of the attendees. After washing and sanding, I used a coat of gesso to start with a more uniform background.
 These were the fronts of 2 of the houses I made. The one on the left was for my friend Diane (lover of theatre and cats) and the one on the right for Maryjo. I layered old book and music pages, and added a bit of molding paste. After all was dry, I painted with acrylics. The door, fence, and roof are thin balsa wood. I found the chipboard windows at Alpha Stamps (they have great stuff - one of my favorite company's).
 I even decorated the backs! You can see some of the texture better on the house on the right. The image on the left was from the Moulin Rouge patterned paper pad. I also used rubber stamps and ephemera to embellish the houses. It was quite addicting making these houses!


Tuesday, September 27, 2011
Tuesday's Tip
I was finishing several projects (and making a quick card or two) this past weekend. After stamping an image, I placed my stamp down on my work surface. Actually, I placed it inked image side down on an acrylic block. It left an image on my block. So...I thought, why not try using the acrylic block as a mirror image stamp? The image is not super clear, but it made for an interesting effect. I think that using the larger blocks (stamped) would make for an interesting background!
Monday, September 26, 2011
Little Houses

Sunday, September 25, 2011
Houses
Wow - it has been very busy around here! I had wanted to post earlier in the week, but did not have much time. I had a lot of fun making houses for Scramp Camp. These were from a Club Scrap kit in which you can put little battery operated lights.
 The colors of these two houses were changed (somewhat) by a variety of color sprays (Adirondack, Glimmer Mist and Shimmering Rain). The red heart was made with the Red Queen in mind. Now, the green was actually made with my friend, Nancy, in mind. She is a big Wizard of Oz fan. You can see a bit of the Yellow Brick Road by the front door.

 These are opposite side views of the houses and their inhabitants! These little houses are great fun - I am thinking of a little village, possibly, for Christmas!


Tuesday, September 20, 2011
Tuesday's Tip
I have been taking a couple of on-line classes in recent months. I really like them- especially as you can take the at your most convenient times. One of the more recent was with Christy Tomlinson. She had a great "texture" stamp tip - use the bottom of a flip flop! Some have interesting soles, and can give a fun background texture to projects. I must say I find myself turning over cheap flip flops to see if I would like the pattern!
Saturday, September 17, 2011
Maisons des Artes
was the theme for this year's Scramp Camp. My co-hostesses and I decided to spend the fee on a guest instructor at a local community clubhouse rather than at a hotel conference room. Since we planned to rent KJ's "Ranch House", we wanted to spiff it up a bit and go with a house (maison) theme. Part of the decorations were these mini paper houses from Club Scrap. They came in several color combinations, although we used the Halloween kits. KJ and Mariana kept to the Halloween theme (for the most part).
 We put battery operated mini candles inside. I kept these two fairly simple - adding flower soft flowers to the purple house.
 These three were themed. The black house was celestial with stars stamped and glittered, with the addition of stamp brads. The middle...Halloween-ish with Alfred Hitchcock (stamped on shrink plastic and shrunk down). The purple is a royal house with crowns and fleur-de-lis.
I will show the remainder in my next post!


I will show the remainder in my next post!
Thursday, September 15, 2011
After Scramp Camp

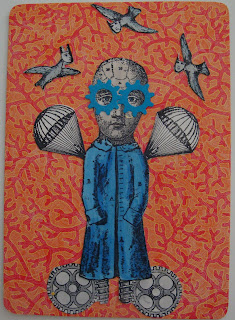
While I was at Scramp Camp, we swapped out our latest round of Elements ATC's. The above card is nickel (a Buffalo head nickel is in the hand). The second element I did in this swap was Silicon:

Tuesday, September 13, 2011
Tuesday's Tip
I was recently attending (as well as co-hosting) out West Coast group's annual "Scramp Camp". We had arranged for Maryjo McGraw to fly out and teach a couple of classes on Saturday. While making a collage in the first class, we need to tear some background paper. Not wanting a scissor cut edge, I grabbed for my ruler to tear a deckle type edge. Unfortunately, I could not find it at the moment. The next best thing - an acrylic stamp block! Worked like a charm!
Sunday, September 11, 2011

Saturday, September 10, 2011
Halloween Treat Boxes
I will be teaching a Halloween Treat box class just in time for the holiday! It will be a quick one hour class at A Work of Heart Studio in Willow Glen.
 The boxes are made from a large Accu-cut Die. We will be using card stock, pattern paper and home made baker's twine. The class will be Thursday, October 6th from 6:00 to 7:00pm. For more information, check out the website by clicking here.

Thursday, September 8, 2011
Upcoming Classes
I will be doing a 2 part scrap class at A Work of Heart in Willow Glen. I will be teaching a 2 page layout class using a variety of media and techniques, including heat embossing, resists, stamping on acetate and punches/die cuts. Below is the layout :

The dates of the class are: September 21 and 28 from 6:00 to 8:00pm. For more information, click here.
Tuesday, September 6, 2011
Tuesday's Tip
I love using Ranger products on projects, cards, and scrapbook pages. One of my favorite background techniques is using Alcohol Inks. Usually, these work best on metals and coated papers, like glossy card stock. Did you know that you can use alcohol inks on porous materials as well? I learned this tip in a Tim Holtz class: use silver Dabber Paint to seal the grunge board or porous material. Once it is dry, feel free to alcohol ink away!
Saturday, September 3, 2011
Textures
This post is a bit of a Scramp Camp tease! I have been working on some projects that I cannot share until after September 9th (the first day of Scramp Camp). The photos are a bit fuzzy as I had to get a close-up so as not to give anything away!
 This is a portion of one of the projects - taken from the front. You may be able to recognize the textures.
 This may be a little tougher to decipher! It is taken from above. Let me know your guesses!


Thursday, September 1, 2011
She Flew....

Tuesday, August 30, 2011
Tuesday's Tip
Color! It is so important in our art, be it scrapbooking, stamping, mixed media, ATC's, etc. If you are anything like me, you probably have a myriad of papers, card stocks, inks, paints etc in a variety of color. I have lists of ink pad colors, but I don't have information on all my paints and mists. I have been thinking of organizing a color notebook for a long time (read 3-4 years!). I also tend to pull ads, magazine photos, etc for color combinations. Well, I have snuck some time away from class samples and Scramp Camp preparations and began a color notebook.
I glued the color inspiration that I have removed from magazines etc and glued them into a notebook. My next step is to catalog the paints, inks, chalks (everything but pens). I am hoping it will help me use what I have - and not buy duplicates! How do you organize your materials?
I glued the color inspiration that I have removed from magazines etc and glued them into a notebook. My next step is to catalog the paints, inks, chalks (everything but pens). I am hoping it will help me use what I have - and not buy duplicates! How do you organize your materials?
Thursday, August 25, 2011
Time Flies
Wow, this month is just flying by! I have a lot going and not enough time. I would love to be able to share some of the projects I have been working on, but they are for our West Coast group's Scramp Camp retreat. They will be a surprise for the attendees...so...no posting! I will be photographing them and will post after the second weekend in September.
I did sneak in a bit of other playtime by doing mail art. I have a bit of a wacky sense of humor, and I tend to express it in my art journals and mail art. This was one of my favorite juxtapositions:
 I have a lot of scenic stamps (well, a lot of all stamps really) . I also tend to buy images in varying sizes. I mixed a couple of "normal" stamps in an unusual way, and came up with the above postcard. The saying is one that seems so appropriate these days! Next time you are playing (with no specific project in mind) try mixing and matching your images for a fun twist!
I did sneak in a bit of other playtime by doing mail art. I have a bit of a wacky sense of humor, and I tend to express it in my art journals and mail art. This was one of my favorite juxtapositions:

Tuesday, August 23, 2011
Pre-empted by Real Life
Wow - it has been quite awhile! Real life has pre-empted all else these days. However, both kids are back at college; class samples are in progress; Scramp Camp art retreat is well into the planning and purchasing stages; and car will be fixed up in September. I will be heading to Boston at the end of the month to move my daughter into her apartment (with her roommate and her family). The car - well, I was rear-ended by a delivery truck on the freeway. Thankfully, it was not serious; although, I was sore for several days.
During this hiatus, I have been doing some planning. But, it is not the same as getting into the paints, stamps, inks, etc. When real life gets in the way, do you miss making art? I have a lot of projects lined up, so planning and sketching will help when I get to them.
I did get some mail art made and sent to friends (and completed the Summer PSL). A great starter for mail art (and can be used for greeting cards) is a purchased postcard. I stamped and cut out some images, and then added them to the post card.
 This was sent to my friend Sherry in Indiana. I should be able to return to normal posting soon...
During this hiatus, I have been doing some planning. But, it is not the same as getting into the paints, stamps, inks, etc. When real life gets in the way, do you miss making art? I have a lot of projects lined up, so planning and sketching will help when I get to them.
I did get some mail art made and sent to friends (and completed the Summer PSL). A great starter for mail art (and can be used for greeting cards) is a purchased postcard. I stamped and cut out some images, and then added them to the post card.

Thursday, August 4, 2011
Mini Book a la Tim


Tuesday, August 2, 2011
Tuesday's Tip
This past weekend, I took 2 Tim Holtz classes at the local scrapbook store. They were tons of fun (it had been awhile since I last saw Tim and Mario). They were project and technique classes. Although nothing was completely new, I did learn a couple neat tricks. Plus I was reminded of a few tips I had forgotten.
In both classes, we used some Distress Stickles and Glossy Accents. The GA bottle I was to use was completely plugged - nothing was coming out. Thankfully, I had an awl to unclog it. We discussed how frustrating it can be to reach for glues, only to find that they are plugged. One tip Tim shared (and I read this a while ago): when you are done applying your glue, tap the bottom of the glue bottle down on the table when you set it down. Do not slam it down on the table, just a firm tap and then re-cap the bottle. You have now helped the glue to settle back down into the bottle, clearing the tip. And, it should be clog free and ready to go for the next use!
In both classes, we used some Distress Stickles and Glossy Accents. The GA bottle I was to use was completely plugged - nothing was coming out. Thankfully, I had an awl to unclog it. We discussed how frustrating it can be to reach for glues, only to find that they are plugged. One tip Tim shared (and I read this a while ago): when you are done applying your glue, tap the bottom of the glue bottle down on the table when you set it down. Do not slam it down on the table, just a firm tap and then re-cap the bottle. You have now helped the glue to settle back down into the bottle, clearing the tip. And, it should be clog free and ready to go for the next use!
Saturday, July 30, 2011
Getting Back
I am trying to get back into the "swing of things" i.e. blogging. It is funny when you take a hiatus from something - blogging, working out, creating, etc - it is so difficult to get back into it? I know it is worse for me when it comes to blogging and working out! The good news is that I have been getting some creative time in.
With Summer PSL, I have been scrapping a bit more. I have some fun other projects on the back burner while I do a bit of scrapping and card making for my teams (although not a lot of that is being accomplished!). I did finish a fun Halloween page for my daughter's album. She was Micheal Jackson in her 7th grade year. They were allowed to dress up at school - it was quite the hoot. She was unrecognizable - so it did freak out a couple of teachers who thought she was absent - until they heard her voice announcing her presence!

I used one of the wonderful Halloween stamp sets from Artistic Outpost. One of my favorite, and very old, techniques is mixing ink colors on the stamp. I used India Ink Black and Adirondack Bright Orange on one of the Jack O' Lanterns and on the title. It is super easy. Ink you stamp with the lightest color, then add little touches of the darker color. It is not an exact science, so you can get slightly different effects each time:
 It looks better in real life - adding depth to the title. (And, yes, I am scrapping photos from 2002 - I am that far behind!) Give it try - if you have not already!
With Summer PSL, I have been scrapping a bit more. I have some fun other projects on the back burner while I do a bit of scrapping and card making for my teams (although not a lot of that is being accomplished!). I did finish a fun Halloween page for my daughter's album. She was Micheal Jackson in her 7th grade year. They were allowed to dress up at school - it was quite the hoot. She was unrecognizable - so it did freak out a couple of teachers who thought she was absent - until they heard her voice announcing her presence!


Wednesday, July 27, 2011
MIA
Yes, I am still around - just missing in action. Real life became oh so busy - a couple of days in San Francisco for "Billy Elliot"(fantastic show), SFMOMA for the Stein exhibit (excellent) and a lot of time with friends and family. As much as I have been enjoying myself, I have felt guilty to have let my blog posts lapse. I have been busy with creating, and I will share some of the things going on.
This coming Sunday, July 31st, I will be teaching a beginning Scrapbook class at A Work of Heart. This will class will be re-vamped in the future since the 6 page ALSB kits will no longer be available. The kit I will be using is Calypso:
 I will also be teaching another card class using Distress Stains and Stencils. I changed it up a bit after my June class. The card stock is from the Welcome kit:

This coming Sunday, July 31st, I will be teaching a beginning Scrapbook class at A Work of Heart. This will class will be re-vamped in the future since the 6 page ALSB kits will no longer be available. The kit I will be using is Calypso:


Tuesday, July 19, 2011
Tuesday's Tip
I have been making a lot of cards as a gift for my mom to use. A quick and easy background that I like to use is embossed panels. I have a bunch of folders from a variety of manufacturers. Every now and again, I cannot seem to find exactly what I am want/need for a particular design. Sooo...I die cut/punch out shapes out of cereal box (or plain cardboard - not too thick). Glue the shapes to a larger piece of cardboard in the size you would like. Once the glue is dry, place your card stock over the panel, create your "sandwich" and run through your Sizzix or Cuttlebug. You may need to use an embossing pad depending on your sandwich. Easy peasy!
Saturday, July 16, 2011
Shhh don't tell...
my mom, but this first weekend of Club Scrap's PSL I made cards for my mom. She is no longer venturing out and is in need of some cards to send out. So, I have been stamping up some cards to put into a recipe box to give her.
![]()
![]() Thankfully, I had plenty of ribbon and fibers to use, as it is Fiber Challenge week in PSL.
Thankfully, I had plenty of ribbon and fibers to use, as it is Fiber Challenge week in PSL.


Thursday, July 14, 2011
Journal Pages...

Tuesday, July 12, 2011
Tuesday's Tip
This week, Club Scrap's Pro Scrapbooking League begins its summer camp. Once again, I signed up for card and scrapbook teams. The challenge this week is to use fibers/ribbon. I generally have no trouble with this challenge as I do have a lot of fibers and ribbons. The challenge for me is to use them in different ways.I sometimes have these little pieces of ribbon left over - not enough to wrap a card or tie a bow. Sometimes, I toss them out. And sometimes, I save them for something. Here's an idea: use a variety of shorter pieces as a center for a die cut flower! I am sure there are other similar uses on die cut and punched shapes. I came across this usage in a Paper Crafts magazine. I'll be giving this a try - how about you?
Saturday, July 9, 2011
Card Challenge
Since our little "Squirrely Challenge" group is on Summer hiatus, I thought I might participate in some of the Club Scrap challenges to keep me in "card making" shape. The card below was created using the specified kit (Mosaic Twist). Since it has been so hot around here (we went from cool and rainy to 90-100 degree temperatures!), I thought a nice tropical, umbrella drink might be in order...
![]() Do hit a lull in creating during the warmer, Summer months? If so, what do you do; shelve the supplies or find inspiration?
Do hit a lull in creating during the warmer, Summer months? If so, what do you do; shelve the supplies or find inspiration?

Thursday, July 7, 2011
A Little Journal Page
I was going through some magazines, pulling out information and tossing the rest. I came across a card with circles and butterflies. Pretty simple - so it came to mind to do a journal page. I love being able to take ideas from one medium to another. I had a partially completed page next to a blank and thought I would use the blank side. Well...it ended up a bit different than I originally planned. And, it became a 2 page layout.
Below is the left side - I added the circles, saying and flower cut out today:
![]() The image below is the right side that I completed today. I used watercolor crayons and stencils on the background. I stamped the circles with Distress Inks. The images are from Helga Strauss (the Art Chick) - they were in a Stampington publication.
The image below is the right side that I completed today. I used watercolor crayons and stencils on the background. I stamped the circles with Distress Inks. The images are from Helga Strauss (the Art Chick) - they were in a Stampington publication.
![]() And, the two pages together:
And, the two pages together:
![]() Both pages came together quickly. What have you used for inspiration?
Both pages came together quickly. What have you used for inspiration?
Below is the left side - I added the circles, saying and flower cut out today:


Tuesday, July 5, 2011
Tuesday's Tip
I have been busy with stencils lately. Most of the stencils I use I have bought from companies like Club Scrap and Crafter's Companion. However, packaging can also act as a stencil. The packages from chip board letters and shapes can act as a stencil. You can use the negative space to draw through. The negatives from punched papers can also be used!
Saturday, July 2, 2011
Stains/Stencils Class


Some of the ladies with their favorite completed card. Many had never made a paper card before this class.


Subscribe to:
Posts (Atom)