Sunday, February 28, 2010

Hatter's House

Although it has been a while since I posted, I have still been busy making cards and layouts. I will have a series of resist techniques to cover this upcoming week.

For now, I am answering a challenge from my friend, Rinda. She has been posting houses on her blog and challenged readers to make an "Alice in Wonderland" house after she created one in a swap. I am a lover of "Alice" - the books and their illustrations. So, it was an easy choice to participate. Is there a book, character, or theme of which you are fond? Take a creative break and create away!

Thursday, February 25, 2010

Mini Book Time out


Sunday night, I took a timeout from all the card making and scrapbooking to dive back into Jeanine Stein's book "re-bound". I had previously made the Hot Water Bottle book and thought I would tackle the gift card book.
I used thicker pages, so I did modify the number of pages and the the number of signatures. Before binding, I inked the white pages with blue and orange to echo the colors of the cover. I think this will be a fun little book for summer images or photos.
If you like making books, you should definitely look for "re-bound: Creating Handmade Books from Recycled Materials"!


Sunday, February 21, 2010

Stamping on Layouts


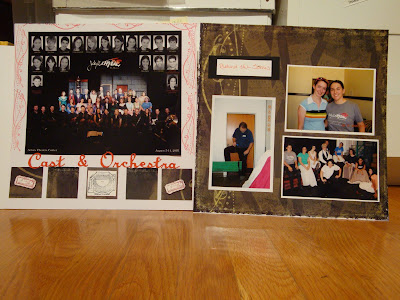
As I mentioned in a previous post, I like to stamp in my photo albums. These above pages are example of making your own background papers. These pages are from a paper bag (yes, white paper bags) book that I made a while back. I thought that I would use the little book for art retreat photos. The white background pages were stamped with a square stamp from Club Scrap. The store where we cropped this particular weekend had blocks of wall colors, so I thought I would follow that theme in the background.
I used this one stamp for all the background pages and just added or subtracted an ink color. This helps to unify the pages and add interest. Of course, this is a fairly simple stamp session. You can get as elaborate as you have the time and inclination.

Saturday, February 20, 2010

Stamping and Scrapbooking


Being a rubber stamper first, I have always used stamps in my scrapbooks. In the early years, I had quite a few scrap company demonstrators horrified that I would rather use stamps than stickers. For me, there is so much flexibility and little extra cost. I have quite the collection of stamps and ink pad colors, so I have endless possibilities without the worry of running out of supplies mid project.
The 3 double layouts above illustrate some of my common usages for my stamps. All of the cardstocks and stamps are from Club Scrap. I use them for borders, accents, and titles. I have also used stamps to create backgrounds on pages when I was not able to find a paper that I liked.

Tuesday, February 16, 2010

Just Launched

Creating with Connie is now on Facebook! I created a dedicated Facebook page for artwork and techniques. This will dovetail into projects that are detailed her in my blog. If you are on Facebook, come by, say "hi" and by all means become a fan!

Sunday, February 14, 2010

Happy Valentine's Day

Wishing everyone a wonderful day and evening!

Using Stencils

This week was the stencil challenge for Club Scrap's PSL. Stencils are great for accents and backgrounds in scrapbooking. I used the "Smile" stencil from Club Scrap's Retro kit. The layout was made from the Extra Extra kit from Club Scrap.
These 2 cards show 2 common usages - backgrounds and focal image. In the above card, I used a polka dot stencil as the background to the cup of coffee. The sentiment eas stamped on a tag made with my Sizzix die cut machine. This highly textured cardstock is from Club Scrap's Henna kit.

For this card, I used the stencil as my focal image. The cardstocks are from Club Scrap's Cruisin' kit - these are great vintage 60's colors. They stencil is from a kit called "Retro" - it all came together nicely. The cute little tag is from a new Stampin 'Up punch, as are the flowers on the tag.


Wednesday, February 10, 2010

Using Ribbon..

An easy way to use ribbon or fibers on a card, loop it through a tag. I made the tag by cutting a rectangle and punching the top corners. I stamped the swirl background image using a VersaMark ink pad. I then over stamped the greeting. All the stamp images and cardstock are from Club Scrap Solstice kit, except for the greeting, which is from Science.

The background is a resist technique. I clear embossed the design and then sprayed Glimmer Mist over the top. Once it was dry, I buffed the embossed images with a dry towel, removing the Mist off the embossed images.

A few other fiber/ribbon uses: tie along the inside or outside edge of a card; hang charms, buttons, die cuts; and, using around present images.

Saturday, February 6, 2010

Glimmer Mist and Ribbon

This was a quick and easy card to create - once the background was dry! The cardstock, stamps and ribbon are from Club Scrap's Solstice Stamp kit. and I sprayed Glimmer Mist on the pieces of cardstock. While they were drying, I assembled the layers, stamping the white matte with an image. Once dry - with some assistance from my heat gun - I stamped the large background image and the "Happy Birthday" on their respective pieces. I added rhinestones to the large image(little blue circles).

For the text element, after stamping, I inked the edges with the same ink. I used the slot punch (from Stampin' Up) to create the slots holding the ribbon.

If you don't have a slot punch, remember that almost any punch will make a great opening for threading ribbon - circle, rectangle, heart, square....Enjoy the possibilities!

Wednesday, February 3, 2010

Cardmaking

I have put aside the book pages for the moment to concentrate on Club Scrap's PSL competition. I am participating on a paper scrapbook (as opposed to a digital) team and a cardmaking team. This weeks cards and layouts are required (for full point credit) to contain fibers/ribbons.

Ribbons and fibers are great multi use embellishments. I used the yellow ribbon as a "photo corner". I sprayed glimmer mists in yellow tones on a white base. I then embossed the sun shape is clear powder. I then resprayed some blue mist on top, buffing the embossed image with a damp paper towel. The card mattes and base are from Club Scrap's Solstice kit.

I will have other ribbon/fiber ideas in the next post!