


I just spent the past 2 days at CHA 2012 in Anaheim. Since it was my first show, it was a bit overwhelming! Of course, it did not help that I hurt my back getting ready to go Southern California for the show. I was walking pretty slowly! So what is out there:
- lots of new patterned paper coming out. Some of my favorites are from Graphic 45 and Pink Paislee.
- Graphic 45 ink pads in colors to match their collections (I think there were about 5 colors).
-Jolee's Boutique stickers will have a paper and embellishment line, French General.
- New Distres Watercolor markers, Tim stamps and dies.
- Tim Holtz eclipse cartridges.
-Ranger has picked up the UK's Dyllusions line of sprays and stamps. Crafter's Workshop will be manufacturing the stencils.
-Faber Castel will have boxed master sets of Gelato's and Fat Brush India Ink markers.
-e.k. Success has, what I think is one of the most innovative products, Stamping Gear.
I also saw a lot of canvas items - books, pre-cut flags, bags, and various embellishments. It was apparent that what was old was new again. Demonstrations at La Blanche stamps featured their stamps used with Ultra Thick Embossing powder and Versa Mark resist techniques.
For those die and stamp combination fans, Spellbinders has a line of dies that works with Heartfelt Creations Stamps. Inky Antics will also have some fun dies that work with their stamps.
My camera battery died on me, but I will have some photos up soon taken from my phone.
Tuesday, January 31, 2012
Sunday, January 29, 2012
On the Road Again
Seems like I was traveling every other week during the last 4 months of 2011 and first part of January 2012. Tomorrow, I am off again to Southern California. Not visiting family or going to Disneyland, although I will be in Anaheim. It will be my first (although hopefully not my last) trip to CHA. I am curious to find out the newest trends for 2012, Many companies have been giving sneak peaks during the past several weeks, but I always like to visit the booths whenever possible. There will be 453 exhibitors - yikes! I have planned for Monday and Tuesday at the Convention center - mainly to take my time and, hopefully, see demos and do make-and-takes. As long as companies do not mind, I will take photos and report back as to some of the highlights.
Are there any companies you are interested in? Leave me a comment and I will try to accommodate your requests.
Are there any companies you are interested in? Leave me a comment and I will try to accommodate your requests.
Friday, January 27, 2012
Mini Book Continued

The inside pages can be done a couple of ways. Since I wanted to use up some scraps of patterned paper, I cut each page individually to the same dimensions as the front cover piece. In the past, I have trimmed the pattern paper to span the center fold - approximately 2 3/4 x 5 1/2. I used a tree and snowflake punch to add embellishments.

Tuesday, January 24, 2012
Tuesday's Tip
I love using punches and dies in making cards and embellishments. Not only can you use the actual cut out shapes, but you can create your own stencils and masks. Run acetate sheets through your die cutter or punch. You will have a positive and negative image to use for sponging, spraying, painting. The acetate can be wiped cleaned and re-used!
Thursday, January 19, 2012
!2 x 12 Book


Once you have made your cuts, you can remove it from the score tool. I use the Martha Stewart scorer and leave on the card stock because I find it easier to make straight cuts. You will then start at one side and make a series of accordion folds up the row. When you come to the point where the squares are joined, fold on top of the next row and continue accordion folding.


Tuesday, January 17, 2012
Tuesday's Tip
It has been another crazy month - lots of traveling, movies and time spent with family. As things begin to settle down, I am looking forward to finishing some art started before the craziness of the holiday season. One concept I am reminded of at the start of the new year is that of practice. To get good at anything fro sports, cooking to art - one must practice. Make mistakes - have a sense of humor bout them and learn from them. No earth shattering recommendation for today - just practice your art and enjoy the process (and, hopefully, the results...).
Thursday, January 12, 2012
One 12 x 12
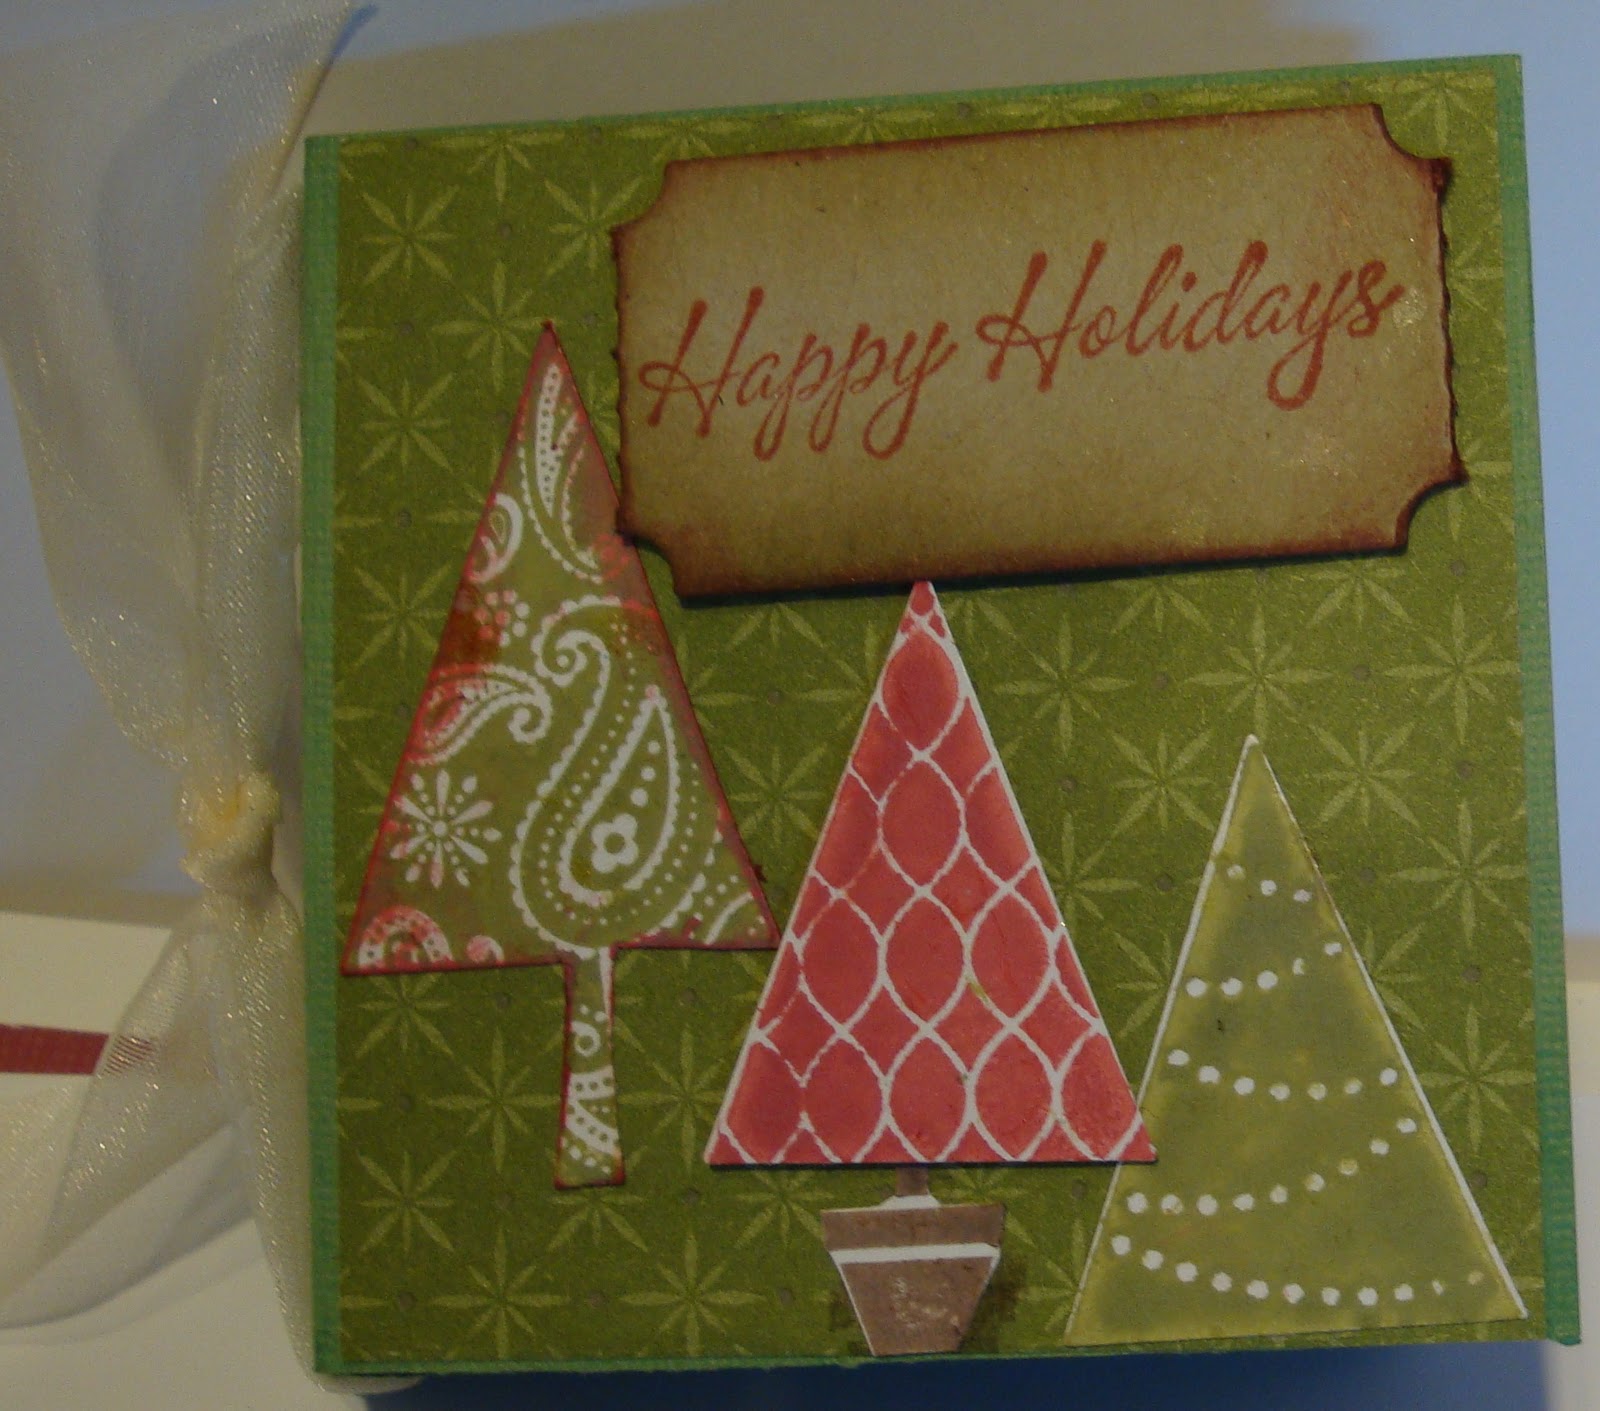
I was reminded at a Christmas open house of a great way to make mini books from one 12 x 12 piece of card stock. I made several as gifts, all the recipient needed to do was to add her own photos. Although I made them from Christmas themed, this can be adapted to any holiday or occasion. One of the completed books is pictured below
 This is the front cover - I have a ribbon wrapped around the spine. A sampling of the pages is below:
 I used Stampin' Up card stock and Christmas pattern papers. I stamped, punched out, and cut out accents for each of the pages. In upcoming posts, I will share the step by step procedure.

Tuesday, January 10, 2012
Tuesday's Tip
It is a new year and i have decided to do some purging of supplies. We have a couple of stores that hold a Flea Market so you can sell your used stamps and tools. I have start putting some stamps aside, but was a bit undecided on a couple of them. I had used the a lot and thought their time was over. Then, I read an article from ClothPaperScissors of cutting up your stamps. I used to do this all the time - especially with stamps having an object and a saying. So, I started to look at some of the stamps I was planning on selling...a few would be perfect for this idea. Although it may sound like blasphemy, consider giving your stamps new life and get out those scissors!
Monday, January 9, 2012
Hark...
I was finishing my Christmas cards, trimming the music Washi tape. I was accumulating a bunch of triangular shaped bits of tape. I really did not want to waste it/throw them out (yeah, I know...). So, I decided to add them to a couple of blank journal pages as part of the background. After the cards were done, I pulled out the journal to finish the pages (I am involved in a monthly journal exchange and need to get going!). The music theme inspired me to make a holiday/angel page. I did some light stamping with Club Scrap's holiday stamps and added some spray mists. The larger angel was reduced from an angel graphic on a 12 x 12 Club Scrap scrapbook page. I cut the image from the card stock and reduced it on my computer. The end result was:


These pages came together quickly and easily - I think the bits of tape helped jump start my creativity.
Saturday, January 7, 2012
Background Play
I posted previously about a couple of on-line tutorials to jump start your creativity. One of which is the Strathmore Paper on-line classes. The current one is by Traci Bautista and cover background and doodling techniques. So, I thought I would give it a whirl, especially since it is free. I am working in a journal and not on a sheet of paper. For the pages below, I picked a couple of stencils and masks and set them randomly on the journal pages. I chose to use Shimmering Rain sprays as my first layer:

As you can see, just a random background. I let it dry and added a couple of different stencil and used a couple of stronger Smooch Spritz sprays:
 I like the depth so far, so I think I will stop with the sprays. my next step will be to add some acrylic paint accents. I am thinking of adding in some blues/teals...

As you can see, just a random background. I let it dry and added a couple of different stencil and used a couple of stronger Smooch Spritz sprays:

Thursday, January 5, 2012
A Bit of Inspiration
The New Year means new beginnings. It also can be new sources of inspiration. There are 2 recommendations should be in need of a bit of help.
Strathmore Art supplies offer free on-line classes. I did several of these last year. This week began a 4 week mixed media class by Traci Bautista. Each week consists of video techniques, with a PDF of the class that you can download and save. Information can be found http://www.strathmoreartiststudio.com/
Another fun source of inspiration can be found at Nathalie's Studio blog. She has a series from a variety artist for a "Creative Jump Start" for 2012. So far, there have been 3 videos - all with great information. You can find her blog here.
You never know what will spark your creative muse, so may want to give these sources a peek!
Tuesday, January 3, 2012
New Year
Happy New Year! It is that time of year when a resolutions abound. Last year, my crafting resolutions centered around clean up and organization. Although I had my moments (or, more likely, my weeks!) i did a decent job on keeping with the need to clean up after a project and putting tools and toys away after purchase/usage. I will continue to work on these this year.
I have discovered - more likely, admitted to myself....out loud...so I had to pay attention...that I indeed have too much card stock. Blasphemy to some, I know...but the evidence is spilling off the shelves. I guess that takes us to another goal - buy less and use more! I have already started to accomplish this - at least the "buy less"part! How did you do with last year's resolutions? Made any new ones for 2012? Do tell!
I have discovered - more likely, admitted to myself....out loud...so I had to pay attention...that I indeed have too much card stock. Blasphemy to some, I know...but the evidence is spilling off the shelves. I guess that takes us to another goal - buy less and use more! I have already started to accomplish this - at least the "buy less"part! How did you do with last year's resolutions? Made any new ones for 2012? Do tell!
Subscribe to:
Posts (Atom)


