We shall see who finds it and if they contact the Facebook group!
Friday, June 29, 2012
Abandoned!
I abandoned one of my tags today - finally remembered to bring them with me! It was at my hairdressers, in the restroom:
Thursday, June 28, 2012
Star Bursts and Layers
These are two things that are new for me. I used the star bursts on a Graduation layout class, but I have not used it in one of my layouts. This one page layout is based on a sketch/technique from May Flaum's Camp Scrap:
I used a bit of layering - card stock, Washi tape, and a "Howdy" banner. The stars and circles are my burst of embellishments. The patterned paper is from My Mind's Eye - it was fun to use patterned paper as the basis of the page! Stamps are from Club Scrap. I used Aged Mahogany Distress Stain on the Grunge board letters. To highlight them a bit, I edged them in black. (If you read regularly, you know I edge everything!)
Wednesday, June 27, 2012
ATC Abandonment
I mentioned the Art Abandonment movement in Monday's post. Of course, after completing my tags, adding my information on the back, I forgot to bring them with me yesterday on my errands! So, today I am much better prepared! I did finish the ATCs I had been making. As a plus, I used a stamp set I bought months ago that was, ahem, never used! (I am thinking I may not be the only one who has new/unused stamps...anyone?)
For these, I painted over book pages and patterned paper, and stamped the image from Artistic Outpost. I added a bit of color using Faber Castell india ink markers. I am thinking of taking these with me (or at least putting them in a baggy in my purse) on my errands the next few days!
Tuesday, June 26, 2012
Tuesday's Tip
One of the art activities I really enjoy involves art journals and mixed media. I am often asked how one starts a journal. I remember having this discussion many years ago with Tracy Moore. You just start. (He gave me this same advice) I am not a writer or diarist. I use my journals for visual art. A great way to start is to use it for practice - lettering, stamping, inking. Ink up and stamp new stamps onto a page. You can try ideas in your book rather than on a scrap paper. It is a great starting point and you never know where it can take you. Worst case scenario - gesso over everything and start again! Just start...
Monday, June 25, 2012
Tags and Art Abandonment
How funny that an idea that has been around for a while has suddenly become a hot topic. I have always heard of "Guerilla Art" - in which you make a random piece of art and leave it for someone to find. I have even discussed this idea with friends. Well, it took Michael De Meng to rally us all to action!
On Saturday, I was at a crop with May Flaum, as part of her Camp Scrap on-line class. I brought some tags and ATCs to work on - as in transform into art to abandon. The four tags I made look like this:
I originally thought I would take these to Paris. I may still take a couple and make some thing else. I have a lot of appointments this week, so I will be bringing my art with me. If you are interested, there is a Facebook group :www.Facebook.com/groups/ArtAbandonment. Come by and read some of the commentary (open to all) - you may be tempted to join us!
Friday, June 22, 2012
One Stamp Three Ways
At Camp Scrap last week, May Flaum posted three cards using one stamp, each were slightly different. So, I decided to use some new Lawn Fawn stamps and give the technique a try. First up:
I stamped the bike and cut it out, mounting it to the chevron stamped panel (pretty neat set of stamps, those chevrons...). I added some small cloth flowers to the basket. The second card:
I embossed the bike using the Champagne Versa Mark pad and clear embossing powder on a white panel. I stamped flowers in the basket and applied Flower Soft. I matted the panel onto several players of card stock and patterned paper (Pink Paislee's London Market). The last card:
I stamped the bike in black and over stamped slightly in Stormy Sky Distress. I stamped, cut out and popped up the pinwheel. I used the bike stamp - actually just the wheel portion as a background on the main base of the card. Patterned paper is from Authentique.
Now, it's your turn!
I stamped the bike and cut it out, mounting it to the chevron stamped panel (pretty neat set of stamps, those chevrons...). I added some small cloth flowers to the basket. The second card:
I embossed the bike using the Champagne Versa Mark pad and clear embossing powder on a white panel. I stamped flowers in the basket and applied Flower Soft. I matted the panel onto several players of card stock and patterned paper (Pink Paislee's London Market). The last card:
I stamped the bike in black and over stamped slightly in Stormy Sky Distress. I stamped, cut out and popped up the pinwheel. I used the bike stamp - actually just the wheel portion as a background on the main base of the card. Patterned paper is from Authentique.
Now, it's your turn!
Thursday, June 21, 2012
Squirrely Challenge
The technique for this Squirrely challenge is in the current Technique Junkies Newsletter. It is the Tag Fence technique:
I ran white card stock through my Sizzix, using the tree bark embossing folder by Tim Holtz/Sizzix. Stampin' Up's tag punch was used to punch the tags. I stamped the floral branches and cut them out, mounting them on the outside of the fence. I love the background paper - actually the whole pad of paper! It is from Basic Gray "What's Up". To see Nancy's version for this challenge, go here. Have fun trying this for yourself!
Wednesday, June 20, 2012
Watercolor Mailer
As I mentioned during my "spray paint period", I have been following Maryjo Mcgraw's "secret blog". The next project was a watercolor mailer. I did not have the exact same size of watercolor paper, but was able to make this smaller size work. I thought I would go with a theme when picking colors and stamps. Below is the front side:
I was impatient for the colors to dry - so they mixed a bit more than Maryjo's example. I used Distress markers and the brush less watercolor technique to add the images.
This is the back side of the mailer:
As you can see - land and sea was the theme! Images were stamped using the same technique as the front side. Stamps from Stampin' Up, Club Scrap, Artistic Outpost, Memory Box, and Printworks.
I was impatient for the colors to dry - so they mixed a bit more than Maryjo's example. I used Distress markers and the brush less watercolor technique to add the images.
This is the back side of the mailer:
As you can see - land and sea was the theme! Images were stamped using the same technique as the front side. Stamps from Stampin' Up, Club Scrap, Artistic Outpost, Memory Box, and Printworks.
Tuesday, June 19, 2012
Tuesday's Tip
I recently read a fun idea - money saving as well! You can make your own glue dots (any size or shape) by dropping dots of Aleene's Tack-it Over onto wax paper. Let them dry clear and you are set to use!
Monday, June 18, 2012
Merci
I bought the Simon Says Stamp June card kit - love it! The pattern papers are from a line I just love - London Market by Pink Paislee. I thought this would make a fun thank you card for friends. I also was able to use some of my most recent die purchases. The circles and scallops are from Lifestyle Crafts. But, my favorite was a local find from the "Memories Live On" scrapbook store - an Eiffel Tower die!
The white flower is part of a Stampin' Up doily die that I cut apart. The little doily stamped around the top and bottom edges is from a Prima set - and stamped in Distress Spun Sugar and Iced Spruce. The stamp is a very old unmounted - not sure where it came from! Mint ribbon from my stash is behind the dies and banner.
Friday, June 15, 2012
Butterfly Booklet
I have had this sitting around unfinished since last October's Club Scrap Retreat. I was thinking of re-doing the envelope book and using different colors. Instead, I just decided to finish it as is (with minimal changes) and use it as a technique book for chalks.
This is the closed booklet. It is made from 5 x 7 envelopes. We used 3, but I like the look of 2 much better. Close your envelopes, then trim a little off the top to make openings. Fold the in half and glue back to front, with the opening at the top. The booklet will look like a "T". The third envelope was folded and glued at the meeting of the bottom of the "T". It folds in toward the spine area. It is awkward and does not open well, hence my preference for making it from 2 envelopes.
I left the 3rd envelope in place, but glued one side down so I had only one extra, decorated page. I put a pull out card with hand written instructions of the chalk technique used on the butterfly below:
This is the closed booklet. It is made from 5 x 7 envelopes. We used 3, but I like the look of 2 much better. Close your envelopes, then trim a little off the top to make openings. Fold the in half and glue back to front, with the opening at the top. The booklet will look like a "T". The third envelope was folded and glued at the meeting of the bottom of the "T". It folds in toward the spine area. It is awkward and does not open well, hence my preference for making it from 2 envelopes.
I left the 3rd envelope in place, but glued one side down so I had only one extra, decorated page. I put a pull out card with hand written instructions of the chalk technique used on the butterfly below:
A finally completed project of techniques to go with my other little hand made technique books.
Thursday, June 14, 2012
Little Darlings
I am a big fan of Graphic 45. Unfortunately, I spend more time hoarding it than using it. I am determined to change my ways. So, when I needed to make a baby card to send with a gift, I immediately grabbed for the "Little Darlings" paper pack. I used a background print and border strip.
The card is actually a little brighter than it appears. The buggy stamp is from Paper Inspirations (and is probably at least 10-12 years old). I love the little cavorting baby strip! The punch is from Stampin' Up. I used Distress Ink to stamp the buggy and age the edges of the panel.
Wednesday, June 13, 2012
Camp Scrap
I will be participating in May Flaum's Camp Scrap. It is a free summer camp of ideas for scrapping and card making and what ever else! I am hoping to jump start my use and paring down of my stash.
Monday's post discussed clustering of embellishments on a scrapbook page (but can be used on any project). Perfect timing! On June 20th, I will be teaching a layout class using this very technique.
The lower right hand corner contains my cluster of stars, gems, pearls, and punched circles. I usually lay them out to get an idea of placement - the larger sizes first. Then, I glue those down with dots of glue on the background. I add the smaller sizes to fill in and stretch out the design. Your turn to give it a try!
Monday's post discussed clustering of embellishments on a scrapbook page (but can be used on any project). Perfect timing! On June 20th, I will be teaching a layout class using this very technique.
The lower right hand corner contains my cluster of stars, gems, pearls, and punched circles. I usually lay them out to get an idea of placement - the larger sizes first. Then, I glue those down with dots of glue on the background. I add the smaller sizes to fill in and stretch out the design. Your turn to give it a try!
Tuesday, June 12, 2012
Tuesday's Tip
With Father's Day fast approaching, there is most likely a flurry of card making activity occurring. A great start to a masculine cards is to use dark colored base cards. I like to use a dark tan or gray - it helps set the tone of the card. Happy Card Making!
Monday, June 11, 2012
Parting Company
For those who have been reading my blog for awhile, you know that I have been a big supporter of the monthly kit company, Club Scrap. I started my membership in 2005 as a member of Club Stamp. I changed membership types a couple of times, but received pizza boxes every month. For a couple of years, I was part of their sales force.
In my opinion, I have found that, as times and styles change, they have not kept up. Too often, I was disappointed with the dark colors and reconfigured graphics of similar kits. Prices went up, less items were appearing in that monthly pizza box. It has been a big disappointment, particularly since I was an avid supporter.
So, it was time to part company. You may still see references to their products - heaven knows I have a ton of card stock! But, I am going back to working more with a lot of other companies that I have come to love. I am looking forward to the change (it has actually already begun!)
In my opinion, I have found that, as times and styles change, they have not kept up. Too often, I was disappointed with the dark colors and reconfigured graphics of similar kits. Prices went up, less items were appearing in that monthly pizza box. It has been a big disappointment, particularly since I was an avid supporter.
So, it was time to part company. You may still see references to their products - heaven knows I have a ton of card stock! But, I am going back to working more with a lot of other companies that I have come to love. I am looking forward to the change (it has actually already begun!)
Friday, June 8, 2012
Tough Times
I miss stamp stores. Since I began my artistic adventures over 20 years ago, I have always been a rubber stamper first and foremost. Back then, there was a plethora of stamp stores in Southern California (including the mecca, Stampa Barbara). When we moved to Alaska in 1994, there was a rubber stamp store there. In 1996, we moved to the Bay area, where the Northern California mecca, Stamper's Warehouse, was located a long with a several smaller stores. Unfortunately, they are gone.
Scrapbook stores started to flourish - seemed there was one in every city/town. Now, they are gone. A couple of weeks ago, Jazzy Crafts announced that they would be closing. Economic times being what they are, I think more people have a difficult time with non-essential spending. For art and craft retailers, it has been a bumpy ride.
I try to support my local (and not so local) stores as much as possible. Support your local stores, before they disappear. I have found my taste has changed a great deal (again!), so I find it easier to support local stores.
Except for the stamps....I still miss stamp stores.....
Scrapbook stores started to flourish - seemed there was one in every city/town. Now, they are gone. A couple of weeks ago, Jazzy Crafts announced that they would be closing. Economic times being what they are, I think more people have a difficult time with non-essential spending. For art and craft retailers, it has been a bumpy ride.
I try to support my local (and not so local) stores as much as possible. Support your local stores, before they disappear. I have found my taste has changed a great deal (again!), so I find it easier to support local stores.
Except for the stamps....I still miss stamp stores.....

Thursday, June 7, 2012
Spray Paint part 2
Yesterday, I posted a spray paint project my friend,Nancy, and I did. I was letting the finished projects dry an extra day before using them. The back of the desktop organizer:
The same object - side view:
And, the completed view of the organizer as it will sit on my desk:
I added polka dot Washi tape to the front and along the edges of the compartments. The completed plastic tumbler that I use for miscellaneous storage:
The top band is actually painted red, while the dotted pattern is painted black. You could also add stamping or collage if you do a project like this. I liked the graphic urban design feel of the paint without any more decoration.
The same object - side view:
And, the completed view of the organizer as it will sit on my desk:
I added polka dot Washi tape to the front and along the edges of the compartments. The completed plastic tumbler that I use for miscellaneous storage:
The top band is actually painted red, while the dotted pattern is painted black. You could also add stamping or collage if you do a project like this. I liked the graphic urban design feel of the paint without any more decoration.
Wednesday, June 6, 2012
Spray Paint!
No, I have not been out tagging public property! Maryjo McGraw posted a project involving decorating plain plastic items. Nancy and I are followers of Maryjo's "secret blog", and decided we would try the spray painting project. Since we knew we would not do this on our own, we met at my house with items, cans of paint and stencils.
First, I sprayed a clear desktop sorter with white spray paint. I did 2 light coats. I also sprayed a plastic tumbler that I use for water for paint brushes.
I really love this stencil and thought I would use it on my plastic pieces. Using painter's tape and newspaper, I masked off the portions I did not want to stencil. I used a red "stained glass" effect spray paint that Nancy brought over. I used the same stencil and paint color on my tumbler.
I added a few sprays of black paint as well. The photo above captures our home made spray booth and materials we used. My desk sorter is standing on end after being sprayed.
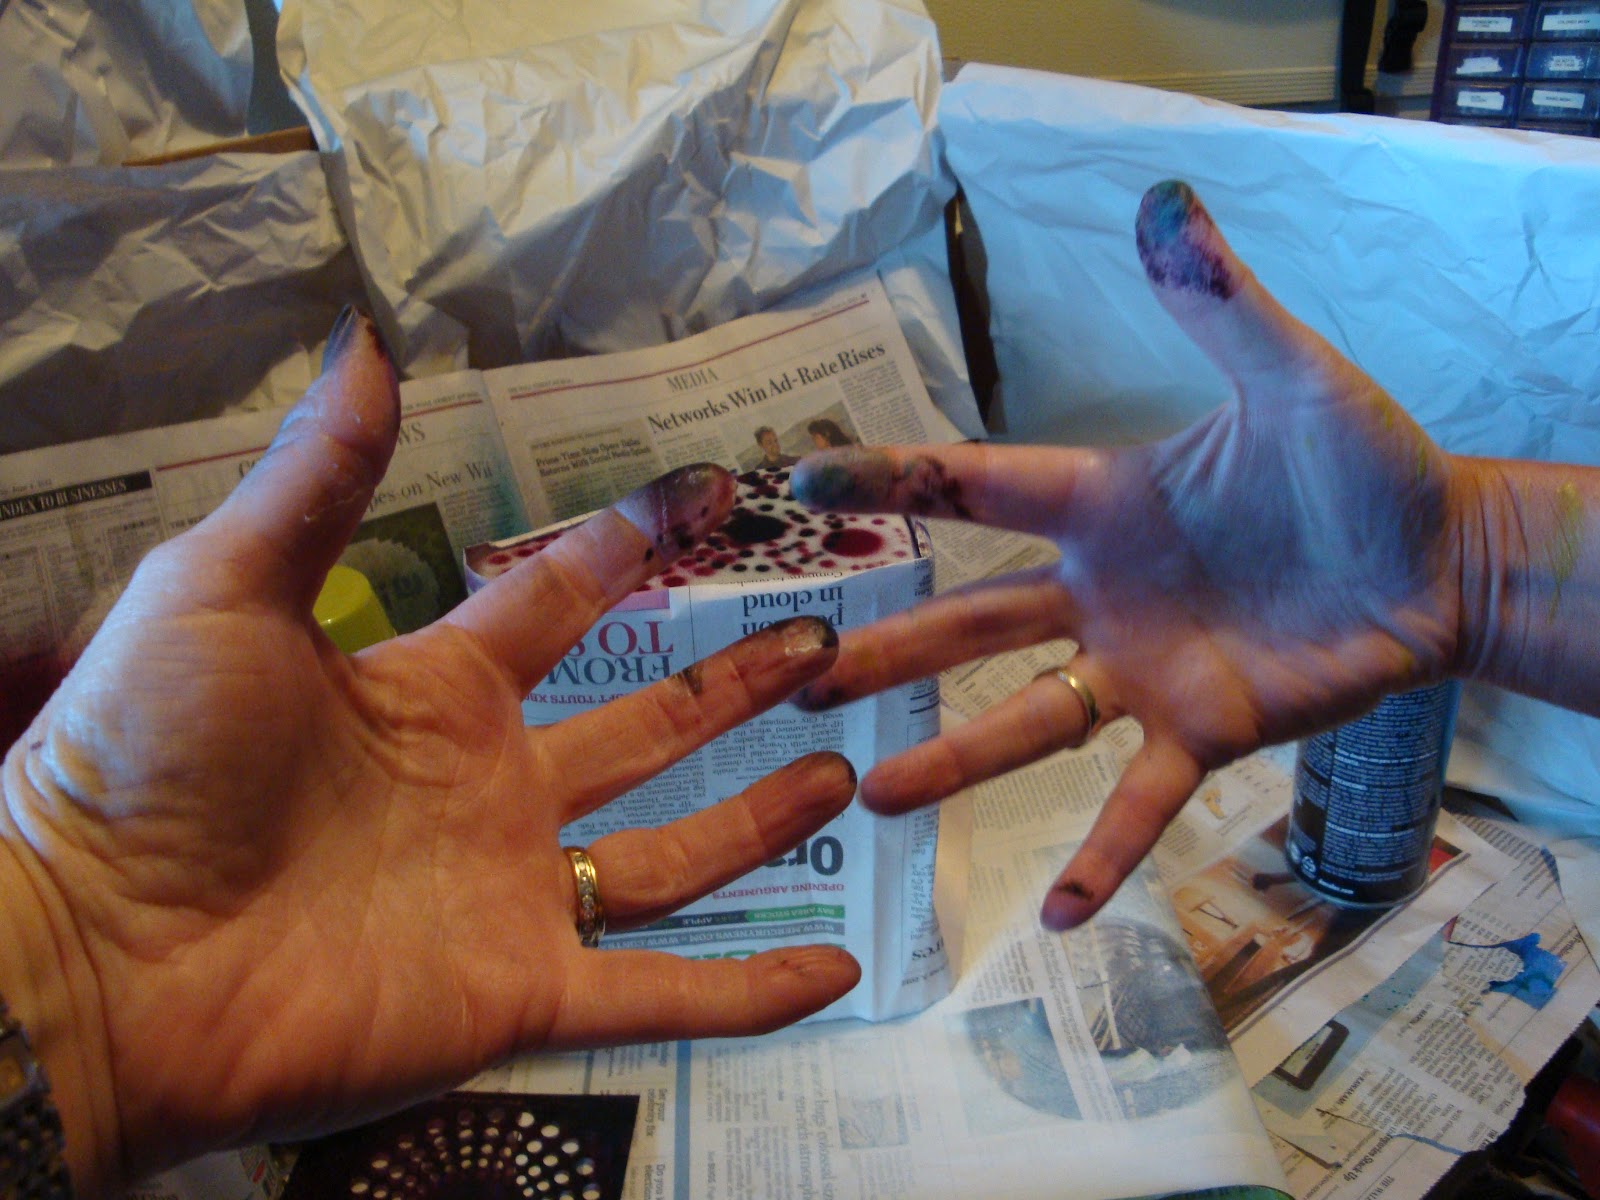
Note to self - next time wear gloves! The angle of the photo makes my hand look enormous next to Nancy's! For photos of Nancy's project: Squirrely Art. She may be posting her projects in the next day or so. For information on Maryjo McGraw and her secret blog:MaryjoMcGraw.blogspot.com.
First, I sprayed a clear desktop sorter with white spray paint. I did 2 light coats. I also sprayed a plastic tumbler that I use for water for paint brushes.
I really love this stencil and thought I would use it on my plastic pieces. Using painter's tape and newspaper, I masked off the portions I did not want to stencil. I used a red "stained glass" effect spray paint that Nancy brought over. I used the same stencil and paint color on my tumbler.
I added a few sprays of black paint as well. The photo above captures our home made spray booth and materials we used. My desk sorter is standing on end after being sprayed.
Note to self - next time wear gloves! The angle of the photo makes my hand look enormous next to Nancy's! For photos of Nancy's project: Squirrely Art. She may be posting her projects in the next day or so. For information on Maryjo McGraw and her secret blog:MaryjoMcGraw.blogspot.com.
Tuesday, June 5, 2012
Tuesday's Tip
(Photo of Lake Alpine, taken last Saturday)
My friend, Nancy, and I will be playing with spray paint and plastics....Whatever you do today
ENJOY!
Monday, June 4, 2012
Playing with Distress
Life has been getting in the way of my creative time these days. I did have a bit time, so I grabbed some tags and reviewed some Distress techniques.
Distress ink was applied to the tag and water drops flicked on the inks. I used a heat gun to dry.
A little "wrinkle-free" Distress used on this tag. I love this little rabbit (Stampers Anonymous/Tim Holtz).
The "brushless watercolor" technique was used on the watercolor paper. Stamps are from Stampin' Up.
Wednesday, May 30, 2012
Kind of Squirrely...
Last week's "Squirrely Challenge" involved double embossing: stamp and white emboss background and then stamp and black emboss image. I was looking for some other backgrounds to use for this technique, and really liked the pattern of an embossing folder. Thus began an experiment:
The embossing folder is a newer Tim Holtz/Sizzix one (came in a set - might have been Spring). I embossed the white panel with the folder. I used my Versamark pen to color the raised areas and white embossed. I did this a section at a time for best coverage. After embossing and allowing to set, I sent the panel through my Big Shot to flatten it out. (My first test did not turn out well as the image was raised too high to get a good stamped image). Then, I black embossed the butterflies and completed the card. The sentiment and punch is from Stampin' Up. I few extra steps, but I now know another use for my embossing folders!
Tuesday, May 29, 2012
Tuesday's Tip
While reading through a Creating Keepsakes magazine a couple of weeks ago, I saw a great idea for using a common baking item. Cupcake liners make great flowers! Since they come in 2 sizes, you have options. As my kids are grown, I find I do not bake as much, but I do have a couple of different patterns of mini cupcake liners. The possibilities should be fun!
Wednesday, May 23, 2012
Squirrely Challenge
This time our Squirrely Challenge is Colorful Silhouettes. it is from the August 2011 Technique Junkies Newsletter. After white embossing a panel, I added several blue tones of Distress Inks. The bird from Impression Obsession was back embossed. The result:
I repeated the white embossed Stampin' Up background on the white card base.The label was stamped and punched, with color added from Distress inks. I used a Ranger nib dipped onto the ink pad to color the label.
For links to other Squirrely Girls, visit Nancy's blog.
I repeated the white embossed Stampin' Up background on the white card base.The label was stamped and punched, with color added from Distress inks. I used a Ranger nib dipped onto the ink pad to color the label.
For links to other Squirrely Girls, visit Nancy's blog.
Tuesday, May 22, 2012
Tuesday's Tip
Get more from your tools by using them in on-traditional ways. I love using stencils on a variety of projects, In addition to using them with inks, sprays, paints, Gelatos etc, I like to stamp through them. It adds a little extra texture to your image or background!
Labels:
Craft sprays,
Inks,
paint,
Rubber stamps,
Stamping,
Stencils,
tips
Monday, May 21, 2012
"Wicked"Commitment...
I finished up a recent journal page for my swap with my friend, Kate. I decided to use some stuff (technical term) that was on my desk. So, tearing papers, painting flowers, and painting/gessoing the pages. I really had no plan. It was looking fairly green as I had a mini kit given to me by my friend, Nancy. So, I decided to go with the "wicked" green theme...
The yellow sun up in the right corner is molding paste through a stencil (yes, both were sitting out - on a counter not on my desk!). The wicked witch was from a coordinating stamp set to Graphic 45's Oz collection. There is a bit more sparkle and glitter in real life as I used some Glimmer Glam and Glimmer Glaze.
Give yourself a challenge - use only a few items or leftovers from your desk, a drawer, a basket, etc. You never know where it will lead!
The yellow sun up in the right corner is molding paste through a stencil (yes, both were sitting out - on a counter not on my desk!). The wicked witch was from a coordinating stamp set to Graphic 45's Oz collection. There is a bit more sparkle and glitter in real life as I used some Glimmer Glam and Glimmer Glaze.
Give yourself a challenge - use only a few items or leftovers from your desk, a drawer, a basket, etc. You never know where it will lead!
Friday, May 18, 2012
More Paper Play
I used the same Pink Paislee line as yesterday's card. Parts of the paper were a bit on the busy side, so I cut the main body out of the center of a 12 x 12 sheet of patterned paper. The pink swirls and flowers along the top were from another part of the same 12 x 12 sheet of paper. I cut them out and added them. I used the Stampin' Up butterfly embosslit for the small butterflies (and a bit of acrylic paint).
Remember, you can use any part of a 12 x 12 design and re-arrange it as you see fit. You just have to cut it (and I know sometimes that is NOT easy!)
Thursday, May 17, 2012
Paper Play
I have fallen in love with patterned paper. Yes, it has been around for many years - and I had a lot at one time. It was mostly 8 1/2 x 11, and pretty basic. So, I stopped buying it and starting making my own with rubber stamps and inks. Then, I could customize each page as needed.
Jump ahead: there are so many wonderful themes and collections available. I resisted for a while - mainly purchasing (and hoarding) Basic Grey. Then, came all the Graphic 45 collections....sigh. So, I have not only embraced patterned paper, and bought patterned paper, I have been using patterned paper. The above card is all Pink Paislee except for the stamped message. I cut (and die cut) portions of a 12 x 12 sheet - making a pretty little card.
Tuesday, May 15, 2012
Tuesday's Tip
As I am in Boston visiting my daughter, I am not in the studio. So, the tip for today is to have fun! Be it crafting or traveling , relax and enjoy!
Monday, May 14, 2012
For the Boys...
When my daughter was in high school (both kids actually), I would find some quirky odds and ends for stocking stuffers and Easter baskets. One year, I found the bank pictured below for her basket:
Over time, we would jokingly refer to "adding to the therapy fund" as things came up. Apparently, two of her college friends thought we had a "real" therapy fund. It is actually pretty funny, given both boys have spent time around Megan and I and know we have a rather obtuse sense of humor. So, I get a text that the boys think it is a real fund. So, I ask her if they are jealous. I receive a text back that they want their own. I had 3 days before going to Boston and could not find a bank of any kind. I did find metal canisters and devised a way to make them into banks. Add a couple of old Rubber Baby stamps, a Ken Brown/American Art Stamp and some letters...
Hope they are happy...otherwise, I will need to add to the fund...
Friday, May 11, 2012
In The Neighborhood
I completed a double page spread for my journal exchange. I thought I would use the background I made with paint and plastic wrap, adding some new purchases. It is a bit less busy in person as the pen work did not photograph well. I used one of the new Hero Arts stamps (large house) and paired with Basic Grey's Out of Print paper. I used the On The Edge houses from Tim Holtz/Sizzix to die cut the patterned paper. A few stickers and punched circles were added.
Wednesday, May 9, 2012
I finally completed this tag - started when I took May's class. I really liked the background - patterned paper (Pink Paislee) glued to the tag and then Tim Holtz tissue glued on top. It is a great look - more interesting in real life. A little inking, and then I cut out and attached the bird and cage with pop dots. To add a little interest, I smeared some Distress Stickles onto the cage and added Glossy accents to the flower. A nice and quick embellishment for a future card or other project!
Tuesday, May 8, 2012
Tuesday's Tip
Banners and flags are very popular embellishments these days. There are a variety of dies and punches available. Sometimes, you have a need for a specific size. It is easy to custom make the banner or flag you like. To get an even end, use your corner punch. Kim Reilly, a friend from the Club Scrap forum, shared this tip with everyone - center the corner of a square punch on you banner, and punch. It works great! Thanks, Kim!
Monday, May 7, 2012
Dies for Guys...
I am still playing with die cuts. It is pretty easy to make feminine cards - there are a lot of fun flower and butterfly dies available. I decided to work a masculine card into my collection. The tree and deer dies are Sizzix/Tim Holtz. I "Distress Inked" the background of the blue panel and stamped the same colors onto the white fold over card. The punch is by Stampin' Up and sentiment is Hero Arts.
Friday, May 4, 2012
For Mom...
This weekend, I am teaching a boxed card class - just in time for Mother's Day! I really love the Core d'nations texture card stock for the box and card embellishments.
These are the cards we will be making - there will be 2 of each type. The teal and fuchsia are from Core d'nations. All stamps are Penny Black and Hero Arts. The box was previously shown on my blog, but here it is below:
Enjoy your weekend - whether you are celebrating National Scrapbook Day or Cinco de Mayo!
These are the cards we will be making - there will be 2 of each type. The teal and fuchsia are from Core d'nations. All stamps are Penny Black and Hero Arts. The box was previously shown on my blog, but here it is below:
Enjoy your weekend - whether you are celebrating National Scrapbook Day or Cinco de Mayo!
Thursday, May 3, 2012
To Die (cut) For...
I bought the new Sizzix/Tim Holtz border die. I love it! There are a ton of flowers and leaves, in slightly different shapes and sizes. The card above is a class sample. I did not use any leaves, as I liked the large swirl instead. Card stock is Club Scrap and miscellaneous others. I used an embossing folder (QuickCuts, I think) on the background.
Wednesday, May 2, 2012
A Little Bird...
Last weekend, Nancy and I took a class with May Flaum. During the self-paced class,
we had the opportunity to play around. The tag was colored with Paint Dabbers and Distress
Stains. The Hero Arts bird was stamped with 2 colors of Distress Markers. I cut it out and
popped it up, added a die cut branch and fabric flower. I love to mix media, usually I do this
in my art journals. So, it was fun to work on a tag.
we had the opportunity to play around. The tag was colored with Paint Dabbers and Distress
Stains. The Hero Arts bird was stamped with 2 colors of Distress Markers. I cut it out and
popped it up, added a die cut branch and fabric flower. I love to mix media, usually I do this
in my art journals. So, it was fun to work on a tag.
Tuesday, May 1, 2012
Tuesday's Tip
My friend, Nancy, and I took a fun little class from May Flaum. We played with tags, patterned paper and a variety of media. We also discussed some of the new/latest trends. One of these trends is using clusters of buttons and embellishments on cards and scrapbook pages. May had a great tip that I thought I would pass on - when clustering embellishments, put about 6 dots of glue on your layout. Place the embellishments on the dots, then do a few more. It makes it easier to adjust and decide what you think looks good without doing too much at one time.
Thursday, April 26, 2012
Too Busy...
It has been a very busy week. I have been in a creative mode - using a variety of materials that I really do not use enough. My Sizzix Big Shot and various scissors have been used quite a bit. I should be photographing and posting starting tomorrow!
Tuesday, April 24, 2012
Tuesday's Tip
I have been using my dies a lot lately - die cutting for class samples, but also for fun. With many dies you can position them anywhere onto your paper to create a window. I found a great way to hold the die into place is using an appropriate size Post-It note. It works great - and is easy to remove from the card stock or paper.
Saturday, April 21, 2012
Squirrely Challenge
The current Squirrely Challenge from Nancy is from the latest Technique Junkies Newsletter. The technique she chose is cascading images:
I chose one of the images as a starting point, masking and stamping the other images. I made this second card as a sample for my upcoming Stencils class:
The little square opens to a little image of a flower and mini butterfly. You can find more examples of this technique at Squirrely Art.
I chose one of the images as a starting point, masking and stamping the other images. I made this second card as a sample for my upcoming Stencils class:
The little square opens to a little image of a flower and mini butterfly. You can find more examples of this technique at Squirrely Art.
Thursday, April 19, 2012
Real Life
Many things have been going on around here - some good and some not so good. I have several things in the process, but have not had time to get into the studio. I am sure I am not the only one who gets side tracked by "real life". I am re-working a couple of classes,working on the art journal exchange, and have been furiously compiling ideas for when things settle a bit. (Plus, I am 3-0 when going to the Giants game so far this year. We share season tickets!) Those are the good things...
One of the things that has me side tracked is the death of a friend. Our children went to school together and our sons played baseball for years. It was such a shock that it took the wind out of my creative sails earlier this week. She was a wonderful person, so positive,cheerful, and always ready to lend a hand. She will be greatly missed.
Saturday, April 14, 2012
Jazzy Crafts
is a store located in Castro Valley. They have a variety of crafting products (paper and otherwise) as well as classes in stamping, scrapbooking, Copic markers, and others. I am happy to announce that I will be teaching classes at Jazzy Crafts (as well as A Work of Heart). My first class in Saturday,May 5th from 3-5pm. The project:
This gift box will be filled with 4 handmade cards with envelopes. I will show a sample of the cards when we get closer to the date. Information about Jazzy Crafts can be found here.
Thursday, April 12, 2012
Tip Follow Up
I mentioned using plastic wrap for texture in Tuesday's Tip this week. I thought I would show a little of what it looks like. I used this technique in the art journal I am working on. After laying down a thin layer of gesso, I scribbled on the pages with a deep blue Gelato watercolor. I sprayed it liberally with water, moving the book pages around, wetting my finger and smudging, etc. I scrunched up some plastic wrap and let it dry for a day:
This is how it looked as it was drying. I took the plastic wrap off the pages:
You can see the areas of pooled colors. The photo below is a close-up of the left page:
This is how it looked as it was drying. I took the plastic wrap off the pages:
You can see the areas of pooled colors. The photo below is a close-up of the left page:
I will be adding to this page, but you could easily use it "as is" or a card background.
Tuesday, April 10, 2012
Tuesday's Tip
Last Tuesday, I mentioned checking out/reading the labels of your products to determine what they can and cannot do. Now, start trying your ideas! One of my "go to" techniques is using a variety of household items for background texture. Scrunched up plastic wrap and scrunched up paper towels are two of my favorites. To use them with wet mediums (watercolors, paints, re-inkers), scrunch them up and set them onto the wet(painted/water colored) card stock or journal page. Then let it dry. I tend to check on the paper towels and remove them before it is too dry, otherwise it may stick -which is sometimes a good thing and provides more texture. You should have no problem with the plastic wrap.
Now, go play!
Now, go play!
Monday, April 9, 2012
Basic Card Making with Die Cuts
Just a friendly reminder, I list all my upcoming classes on the right side of my blog. Tomorrow's class at A Work of Heart Studio is simple card making with die cuts (and stamps, of course!). These basic 101 classes are similar to make and takes - you will complete 2 cards for $10. Click on the link /houses for A Work of Heart's website.
Hope to see you then!
Saturday, April 7, 2012
Squirrely Challenge
For those who have not heard about this: A group of friends and I try different techniques for cards, tags, ATC's, etc. It was started by my friend Nancy (Squirrely Art) and has slowly grown.
Since many of us took an on-line class (Tim Holtz Creative Chemistry), Nancy pulled the "blended spritz and flick" technique with Distress Inks as our challenge. Since most of the art I have seen made with Ranger/Tim Holtz projects has been grungy, I thought I would use a more traditional, somewhat cute (at least for me!) stamp set.
I used several green and blue shades of Distress ink and splattered water drops. The stamp set is from Stephanie Barnard's Stamps Of Life line. I stamped the sentiment in Distress Faded Jeans and black, a little off set. You can see other interpretations of this technique by clicking on the Squirrely Art link in parenthesis above.
Since many of us took an on-line class (Tim Holtz Creative Chemistry), Nancy pulled the "blended spritz and flick" technique with Distress Inks as our challenge. Since most of the art I have seen made with Ranger/Tim Holtz projects has been grungy, I thought I would use a more traditional, somewhat cute (at least for me!) stamp set.
I used several green and blue shades of Distress ink and splattered water drops. The stamp set is from Stephanie Barnard's Stamps Of Life line. I stamped the sentiment in Distress Faded Jeans and black, a little off set. You can see other interpretations of this technique by clicking on the Squirrely Art link in parenthesis above.
Subscribe to:
Posts (Atom)